Friday, April 26, 2019

Memorydex! cards with Sandi ~ Creative Embellishments

Hello, Creative Embellishments fans! 

Sandi  here with you today sharing my newest scrappy project ... a set of memorydex cards featuring several of my sweet grandkids. 

I was first introduced to Memorydex cards last year when former CE team mate Marci Bensing posted some on the Creative Embellishments Blog

Now I think maybe I'm hooked on this great way to scrap the grandkids but on a smaller footprint.  And I'll be able to "spin" through the photos when I have a spare moment. 


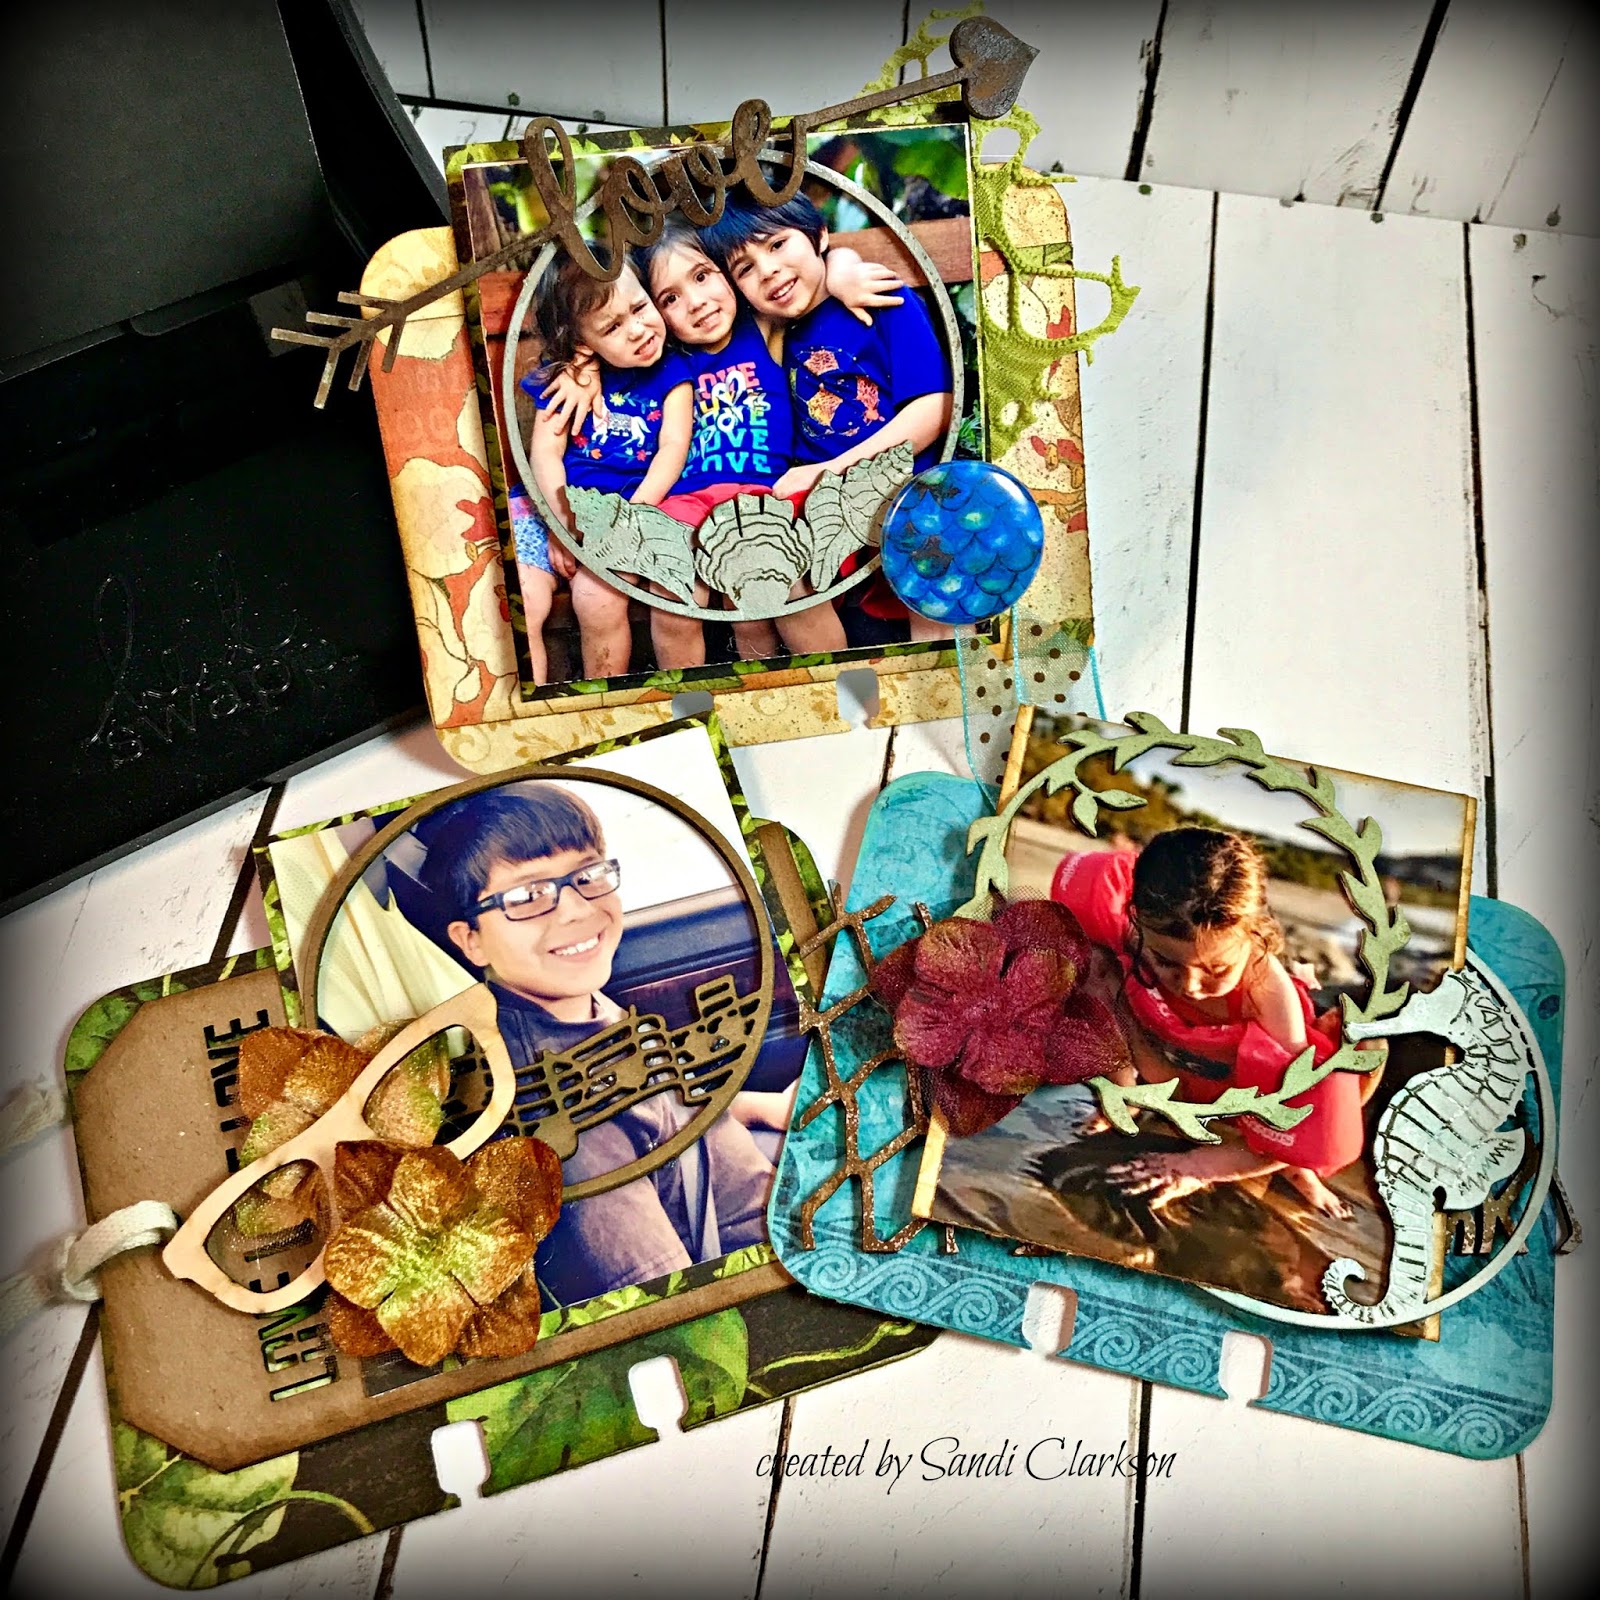
Here's a quick peek at the three I created for today's project with photos I had already printed out. Aren't they adorable? The trick is finding embellishments small enough to fit the cards and still allow some room on the sides so that they will still move on the Memorydex or whatever base you are using. 


This photo is my sweet grandson Chris, taken the day he got his first pair of glasses. I had ordered the  
Geek Chic Glasses wood veneer set especially for this photo ... and was so happy to finally use them! On top of my base paper layer I added a naked tag from the Love Tags set. I did swipe the edges of it with some distress ink. For a photo frame I used one of the Music Artist Trading Coins and let it bare as well. For more interest and texture, I completed this card with some ribbon and a couple of small flowers.

Love Tags
Music Artist Trading Coins
Geek Chic Glasses


These three sweeties take the cutest pictures! Since they live in Ecuador in the rainforest, I decided to use some older tropical paper from Graphic 45. Once again I used a AT coin as a photo frame, this time one from the Sea Artist Trading Coins set. Next I added the title arrow which is from the Love Arrow Set. It was altered with walnut ink. For balance, I added a CE Flair, using one from the Under the Sea Flair set. For a bit of texture, I added some ribbon behind my photo.

Love Arrow Set
Sea Artist Trading Coins
Under the Sea Flair


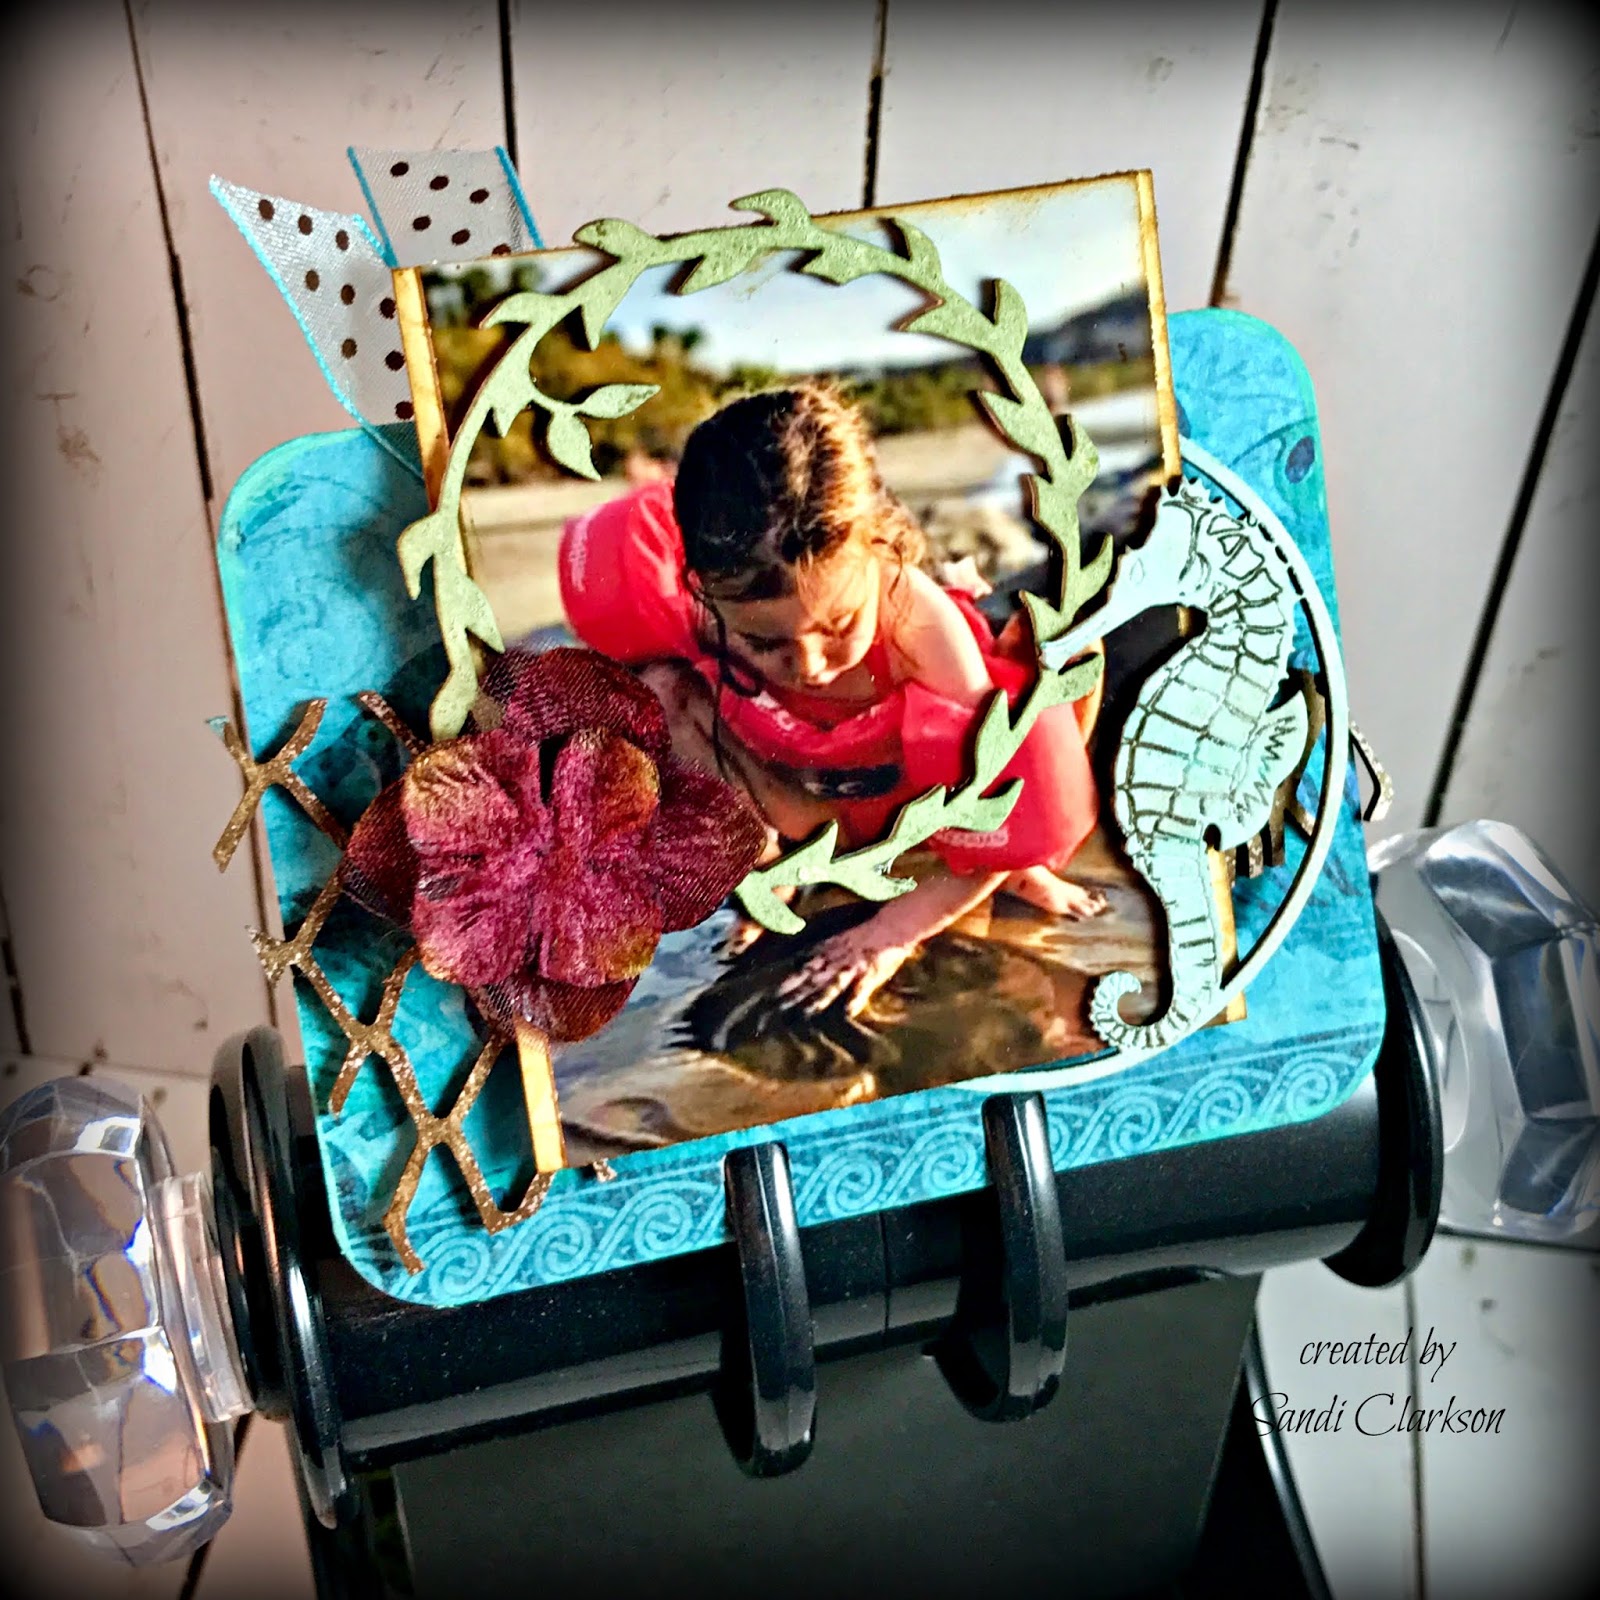
Staying with my tropical theme, I used 2 coins from the Sea Artist Trading Coins set. They were both altered with chalk inks. As a photo layer, I used a bit of the fishnet panel from Fishnet Panel 2. This piece was also altered with Walnut Ink and glistened with a bit of white gesso. A flower and a ribbon completed the card.

Sea Artist Trading Coins
Fishnet Panel 2

That's it from me today!
Nicolle has just added some new leaf sets to the store .. always happens after I place my order, haha! These are amazing!
You need to go check them out HERE.

See you next time.


Creative Embellishments products used: 
Love Tags
Music Artist Trading Coins
Geek Chic Glasses
Love Arrow Set
Sea Artist Trading Coins
Under the Sea Flair
Fishnet Panel 2

Thursday, April 25, 2019

"Amazing" ~ tropical layout for 13 Arts DT

Hello, everyone!

Sandi here with you today sharing my newest layout using the gorgeous Rose Fields paper collection and lots of yummy 13 Arts products including my fave Water Inks.

Because this photo is taken near a waterfall in Ecuador, South America, I wanted to create somewhat of a tropical, rainforest effect. (PC: M. Souza.)


Firstly, I fussy cut the large hydrangea flowers and leaves from a second sheet of the Paper Botanical Garden paper and then set them aside while I prepared the under layers. I applied clear gesso to the primary layer of the Paper Botanical Garden after distressing it and adhered it to Letters to Rose paper ... at a bit of an angle to provide interest.


Next, I further enahnced my background using Modeling Paste and pushing it through the Wonderful Nature Stencil. After the modeling paste dried, I began adding color with the olive green from the Watercolor Set 16 pan as well as Olive Green Ayeeda Ink. Later, I highlighted with 13 Arts SPLASH White Ayeeda Ink and additionally splashed with watered down White Gesso and SPLASH Glitter Old Gold.


I moved on to adding my fussy cut pieces, my photo and florals, including the yummy Green Twigs which I cut into several pieces. For texture, I included Sisal  and  3D Balls in 2 sizes. To add a bit of interest, I printed my photo in a tall, skinny format and then cut it in 3 pieces and mounted them on some of the leftover papers.


Here you can see the Vintage Moments Word Stickers A4 that I mounted to paper and added here as a bit of a subtitle. Also, you'll note the additional dabbing of my Olive Green Ayeeda Ink. I used corrugated cardboard behind my fussy cut pieces and my photo to add height and dimension. 


This is from the upper left hand corner of the layout. You might guess that green is my favorite color. The effect from the stencil, modeling paste and water ink, makes my heart skip a beat! 


Because the family member in the photo had made comments to me regarding the beetles and other insects in this region, I wanted to include a couple of the metal Metal Insects II. I would never had imagined I'd be adding beetles to my projects! 


Last of all, I added the raw chipboard title and called it complete!


Thank you for stopping by today!

Below is a list of the 13 Arts products used:


Friday, April 12, 2019

Sweet Baby Cards for Creative Embellishments!

Hello, Creative Embellishments fans! 
 Sandi  here today sharing a couple of baby cards that I created using slightly non-tradtional colors. 
I was wanting to have another "play" with my CE Artist Trading Coins because they are so perfect for card making. And just because I love them so, so much! 


First I chose the Baby Artist Trading Coins from my CE ATC stash and also grabbed a couple of the solid Artist Trading Coins for where I did an additional paper layer underneath. In both instances, this was the coin on the right. I also picked out a couple of phrases from the Small Sentiment Words set. Before altering my chipboard, I chose some papers from my 13 Arts AMOUR Paper pad A4 knowing that I wanted to do both a baby girl card and a baby boy one. 


Here is the baby boy card using a couple of the CE Baby Artist Trading Coins and one of the solid CE Artist Trading Coins for the coin on the right. I altered all the chipboard using a walnut ink. .. my fave alteration. While that was drying, I assembled my paper layers and then did some stamping using the CE Distressed Moroccan Stamp which is fast becoming a new fave! It gives a classy bit of texture and depth. Then I moved on to adding my coins and sentiment. 


Next I worked on my florals and added some sisal underneath them for more texture. Thinking that the chipboard looked a little plain, I added some Cinammon Stickles with my finger. While I'm not a big Stickles fan, this did brighten up the card. 


I tried to get a good close-up on the sweet coins but it was difficult. The coin on the right has some alphabet blocks that spell out BABY. It's much easier to see in real life. The same was true of the coin on the left which spells baby but has a cute little diaper at the top. 

Here is what they look like:


Lastly,  I used some gesso for blending. 

***

And here is the baby girl card using the Baby Artist Trading Coins, the Artist Trading Coins and the stamps mentioned below. 


I had planned to use some baby pink flowers on this one but alas, the paper dictated some brighter florals. So, while this isn't your normal baby colors, I do like it! I suppose you could also use it as a birthday or a congrats card for some achievement. 

My process on this card was the same as the one above except that the chipboard was altered with some 13 Arts metallic paint. Additionally, I used both the Distressed Moroccan Stamp as well as the Distressed Crackle Stamp for this one. 


Aren't those little feet just adorable? 


And here the coin on the left is a sweet moon and stars ...  so perfect for babies. 

That's it for me today. 
I love building my card stash and of course using my Creative Embellishments products. 
There is lots of inspiration over on the BLOG.
 You will also find the April Challenge there .. still plenty of time to play along! 

See you next time! 


Creative Embellishments products used:
Chipboard:
Stamps:


13 Arts products used:


Thursday, April 11, 2019

13 Arts Easter/Spring project!

Hello, everyone! 
I am up on the 13 Arts blog today as part of today's group post. 
The Design Team was asked to do an Easter or Spring project, so I chose to do a layout featuring a photo of one of my little granddaughters from Easter last year. 


Having been inspired by our April Challenge mood board, I pulled out some of my Aqua Flora papers, using Aqua Flora Blue Dreams as my base with a wide strip of Aqua Flora Pink Bouquet layered on top. These tore some strips of the same and added a few note cards from Aqua Flora Elements A4.

As always, I coated my papers with 13 Arts Clear Gesso. Next I did some stenciling by pushing 13 Arts White Gesso through the Script Stencil Mask.  Before adding my extra layers, I laid down some
Sisal ecru to provide some texture.


After adding my photo layers, I added in some focal color using 13 Arts Metallic Pink Ayeeda Paint which I had thinned down with some 13 Arts Acrylic Liquid Medium. I prefer this to water but water would work as well. 

Next I added my florals, some from my stash as well as some from 13 Arts (Purple Cherry Blossoms.) There are also some fussy cut elements from the Aqua Flora Elements A4 sheet, the banner and the nest. 

The wee bunnies are from my stash but they help clarify that this is an Easter page. 


I had also chosen some chipboard pieces to use as title elements. They are from the Blue Magnolia Chipboard Set A6 and left raw. 


For additional texture, I added some Black Microspheres and some Silver Microspheres. I blended everything with watered down White Gesso as well as White Splash Ink. Lastly I added 3 fussy cut butterflies from the Transparent Foil Butterfly Garden sheet. 

I so enjoyed getting my fingers inky on this one! 
Below are the products used. 
Thanks so much for coming by! 


13 Arts Products used:


Monday, April 1, 2019

Creative Embellishments ~ April Challenge ~ Risen Tag

Hello, dear Creative Embellishments fans!
Today over on the CE blog, a few of the Design Team members are sharing their take on the inspiration photo.


I created a design on one of the CE Large Tags which are 5.5x10 inches! The are such a fun surface to use. I intended to use this as a large bookmark for my Lenten devotionals but it become too dimensional rather quickly! Because I had the Lenten season in mind, there are lots of hidden meanings.


The Creative Embellishments store has so many great products to choose from that it's easy to overlook some that might work perfectly for your project. I can spend hours browsing and always think of new ways to use the products, On this one large tag from the Large Tags set, I've used 7 Creative Embellishments products! The CE blog is also great source of inspiration as well.

There is a tree in the Challenge Image and that is how I got started on my project. I chose the Leafy Tree and went from there. I wanted a frame as base layer underneath the project, so chose the Viney Flourish Frame which you can see in the upper left and lower right. It is a huge fave of mine! All my chipboard pieces except for one was altered with 13 Arts Brown Water Ink.


This is a side view to show you both the dimension as well as some of the individual pieces. I lightened up the leaves of my tree with some gesso thinking of all the fruit trees that are now in bloom here in Texas.


I used the Barbed Wire Border 4 as one of my layers underneath the tree and paper layers. It was altered with 13 Arts Yellow Amber Water Ink and I'm using it to represent (for me) the crown of thorns that Christ wore to the cross. It would more typically used as an outdoor/cowboy/western  theme.


Tucked under some of the flowers, I added the Thorn Flourish Pair which make a nice flourish especially for roses and the like. But frankly, I added them to carry out my Lenten theme. Here you can also spy the Seasons Change Flair which has a tree on it as well. They are such a neat embellishment!


My large tag was covered with a layer of paper and then I randomly stamped with the Distressed Text Stamp. The twist on the Challenge this month is to use wood, so I've added my title thought RISEN using the Alphabet Game Pieces.

I think that's about it. There are lots of layers on this one but it was good therapy to get back in my scrapbook room!

Here is the CE Challenge image for April:


CE chipboard used: 
Large Tags
CE stamp used: 
CE Flair used:
CE Wood Veneer used: 

Can't wait to see your take on the Challenge!
Thanks for coming by !


13 Arts products used: