Pages

Thursday, July 31, 2014

Creative Embellishments August Challenge!


Hello there! It's already time for our August challenge over at Creative Embellishments.  This Summer seems to be slipping away quickly! I'm not a fan of our Texas heat but I sure do enjoy the nice, long days.  It doesn't get dark until 9 pm.

Along with having to use a song title on our project, our inspiration photo this month looks like this:


Very musical, huh? So, I opted to use a photo of our granddaughter playing the piano right before her wedding. Don't those keys look ivory next her white dress? Anyway, after using a stencil and molding paste on my background, I started with the Simple Quatrefoil Panel as a layer beneath my photo and wanted to also use something wavy as in the photo. Since it was something I've been meaning to use, I chose one of the Wavy Film Strips.  Both of these pieces of chipboard were painted with black acrylic paint.  I don't often go with black, so this was a little twist for me. I created a bit of a shine with some Prima Vintage Metal Bloom spray. My song title was computer generated: Ode to Joy. 


I took more time with the Flourish 22 that I've tucked into my floral cluster. It was gessoed and then misting with Lindy's Stamp Gang Green with Envy Green. Next, I inked it with Ranger Distress ink pad in Peeled Paint. I ran my dry green gelato over that and rubbed it in with my finger. This gave me some texture. I finished up the piece with some Sweet Alfalfa from my Twinkling H2Os. While I tucked in flowers and cheesecloth here and there, I added my I Love Music Flair. If you look in the bottom right corner, you can see that I've used my faithful Distressed Crackle Stamp. My apologies! It's my fave!


I hope that you will visit the  BLOG and see what the rest of the Design Team came up with for our challenge! And we hope to see you play along!

Here are the Creative Embellishment products that I've used: 


I have also used the Prima July Build a Page sketch as my inspiration. It's such a beautiful one that I wish I had felt well enough to do it justice. But it was fun to play anyway! 


Thanks for coming by! 


Tuesday, July 29, 2014

Creative Embellishments gift tag!

Hello, Creative Embellishments fans! Sandi here with you today with a sweet tag! 
I needed a tag for a baby girl gift, so thought I'd make one that was frilly and and yet fun. 


I first pulled out some vintage Prima papers from the Tea Thyme collection. And already have another project planned with these papers to finish them up! 

I made some layers on a 4x6 base and then used 3 different punches to make decorative edges at the bottom. Inked my edges and then used my Distressed Crackle Stamp to add some depth. Yes, I've used it again .. it's my favorite! 

Next I got busy priming my two pieces of chipboard with gesso. The Birdcage Style 1 was then dabbed here and there with my Prima chalk ink in Rusty Bucket. I added some random Versamark and used Lindy's Stamp Gang embossing powder in Geranium Coral Blush in those random spots. Just gives it some shine and texture. For the Angel of Mine piece, I've used Ranger's Distress ink in Peeled Paint. I like to blend it on and then go over it with the actual ink pad to darken up a few accent places as well as all the edges of the piece. Darkening the edges of your chipboard pieces almost always makes them pop a bit more! 

I've added some tulle and pearls at the top in the hole I punched, placed a few Prima blooms at the bottom left edge and called it done! Now wasn't that quick and easy ... but still so pretty?! 

Thanks for coming by today! Make sure you check out the STORE and see if there's anything new since you've last been by to shop. 

As always, we appreciate your interest in Creative Embellishments products! 


Friday, July 18, 2014

Love ~ new Creative Embellishments layout


Hello, Creative Embellishments fans! We are so pleased that you dropped by the Blog today. 

Sandi here with you to share my layout of our newly adopted granddaughter, McKenna. My daughter and son-in-law travelled to China last year to adopt her and my other dgd, Molly-Grace. Heartbreakingly, they had to leave McKenna behind at the time due to medical issues beyond their control. However, they could not simply forsake her and went back this year with all the medical advise, gear and medications they needed to safely transport her back to the States. She has many medical issues but the sweetest disposition imaginable. This photo was taken at the orphanage, so the resolution is not the best but I adore that happy smile! 

I've done lots of paper tearing, stamping and stitching to create my page .. and of course my Creative Embellishments products! 


Here is the sweet Ivy Wreath. I love these circular frames that Nicolle creates! They are perfect for bringing focus to your photo, using as a layer or to highlight a sentiment. As seems to be my normal course, I gesso first and then keep adding color until I get the shade I like. Mostly, this one is Lindy's Stamp Gang's Green with Envy Green along with some Ranger's Distress ink in Peeled Paint. Then I added a layer of Dusty Attic's crackle varnish. There is also some painting on the page to highlight my chipboard. When the page was complete, I added touches of gesso everywhere including this wreath.


This is just a view of the Circle Bokeh Stamp in action. My favorite way to use it is with black Stazon ink to add depth and dimension to all my projects. I also tried using it to add some white paint as well and it gives a totally different look. A little more of a messy look. Be sure to clean your paint off right away though so that you don't ruin your stamp! I seriously don't know how I ever got along without this stamp! Love it!


Here is a close-up of the Butterfly Flair. Love the detail. You can also see the crackle on the Ivy leaves. Isn't it grand?


Lastly, the Ivy Spray which I treated the same as the wreath so that they would look like a "matching set." I've been trying to do more sewing on my pages and it looked awesome on this one! 

Thanks again for coming by! Be sure and let me know if you have any questions! 

Sandi


Thursday, July 10, 2014

My Creative Scrapbook July Kit Reveal, part 2

I'm back today to share 2 more projects that I created using the July Limited Edition Kit from My Creative Scrapbook. This is such an amazing Kit featuring KaiserCraft's Storyteller collection along with lots of Prima goodness, resin frames, pearls and a Prima stencil along with some Lindy's Stamp Gang mist! Woo-hoo! 


For this page I took the lacquered KaiserCraft frame and cut out the center carefully with a craft knife. Then I took the border and actually began tearing it! Very carefully so that it would not rip! I just wanted to try something a little different with my frame this time and thought it was perfect for a boy page! Then inked the edges. I took a different sheet of the collection to create a new but smaller inner panel, stenciled it and sprayed it with LSG mists. 


Here is my floral cluster created with some Prima blooms and fussy cut blooms from one of the papers. I altered my white Prima Namazzi bloom to make it tan, added a twine bow and then added one more flower. It's kind of hard to see but there is a Prima resin frame added under the tan blossom and clustered with some of the smaller blue flowers. Additionally, I added some sticker borders across the photo. 


Just a close-up of the ragged, torn edges and stencil work as well as a row of the sweet clocks! 


I've added my title on a piece of cardboard torn from the shipping box! 

***


Next I created a page with some of my leftovers but using that center piece that I cut out from the frame seen above. I went crazy with some shabby, messy punching, did some stamping with my Creative Embellishments bokeh stamp as well as the crackle stamp and oh yes! Used the Prima stencil again here but on a darker color so that it would really show up more. Then misted it a tiny bit. 


Just s lovely flower cluster and ribbon which I've draped across the page. I added in some gauze from my stash but used the metal frame from the kit with a title sticker from the Storyteller collection. Some of my flowers were altered with the LSG mist included in the kit. And of course, a dab of gesso makes everything better! =) 


Another close-up of the gorgeous stencil along with some of my background work and crazy, messy punching! This my not be may favorite page but I've been trying to scrap this photo for a year and finally found the perfect use for it! 

For information about our kits, visit HERE. And to see what the DT did this time, go visit our GALLERY. You're sure to be inspired. 

Thanks for coming by!

Saturday, July 5, 2014

My Creative Scrapbook July Kit Reveal ~ Limited Edition Kit, part 1

Welcome! 
Can I just say how much I loved, loved, loved working with the July Limited Edition Kit at My Creative Scrapbook? Pam's Kits are always over the top fabulous! This month is no exception! 
We are featuring the gorgeous KaiserCraft Storyteller collection. And Prima, of course. Lots of gorgeous flowers and resin frames. 


This is my first page and I dearly loved creating this fab background with paper tearing, some stenciling and adding embossing powder. More on that later this month. We teamed up with Lindy's Stamp Gang this month and had some cool mists to use which I've used here to make my red flowers more peach-y. 

I'm going to let the pictures do the talking this time. As I write this I'm on Day 8 of bronchitis and just barely out of bed .. but improving! 

Love the pearl strand and the super gorgeous Prima resin frames. 


Used some Lindy's to re-color a bit of my lace. 

***


Next up is a sweet page featuring a photo of scrappy friend and fellow DT member Becky Litz's daughter. Isn't she adorable? When I see her cute photos, I think "I wanna scrap that one!" So when Becky suggested it, I was super excited! 
I had more background fun on this one, too, created with a stencil. molding paste and my Creative Embellishments stamps, Crackle and Bokeh.  Some fussy cutting as fillers. Don't you adore the sweet pearl arrows and gorgeous lace? 

Close-ups:

Here you can see a bit of the stencil we got to use this month along with our LSG, yay! I also used the mist to recolor the large bloom. 


***
And here is a photo of the Kit:


Thanks for coming by today! I'll be back in a few days with a couple more layouts! 

For information about our kits, visit HERE. And to see what the DT did this time, go visit our GALLERY. You're sure to be inspired. 

If you are in the USA, have a safe and fun 4th of July weekend! 

Wednesday, July 2, 2014

Creative Embellishments/The Color Room canvas


July??? Can you believe it???!!! 

I am back today with a canvas that I did for my July DT assignment for the Creative Embellishments July Challenge as well as for HeArt and Soul Artists presented by The Color Room's Palette #170.

 The July inspiration photo at Creative Embellishments just screamed "end of the day relaxation" to me! Whether it be on vacation or at home, we all need to re-charge our batteries! One way I relax is by engaging in this fabulous hobby! And especially when I do a canvas because I can get really dirty and messy and if I make a mistake, it doesn't matter! I can paint over it! 

After gesso-ing my canvas, I used a palette knife to smear on thick streaks of molding paste. After that dried, I went back over everything with another round of gesso. Then I concentrated on adding gray to the middle of the piece in keeping with The Color Room palette. Feeling that it was a bit stark, I added in streaks of white. After that I misted with both LSG in Steel Shimmer and Prima Color Boom in Pearl White. That's what's fun about a canvas .. you just keep adding until you like your results! 

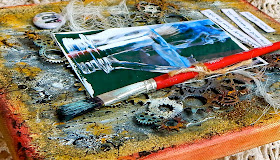
My yellow and red edges were done with Gelatoes and a small bit of LSG Grab a Guy Gold. You know how I love that color!!! Keep in mind that while all this was going on, I did the exact same thing to the Creative Embellishments Steampunk Gear Panel with the exception of the molding paste. And to give the Panel just a bit more oomph, I dabbed it with some Tim Holtz Wild Honey Distress Paint. Loved that so much that I added just a bit to my background as well! It added a bit more depth. Next, I had fun using my new CE Circle Bokeh Stamp. If you look hard enough you'll find it! 

Then to comply with the challenge at The Color Room to "use a toothbrush," I splattered first white and then later black paint all over the canvas .. and the Gears panel. 

What I love most about my piece is the effect of Distressed Crackle Stamp all around the edges and somewhat in the middle of the piece. Love love love how much interest it provides! At the last moment I also did some heat embossing mainly on my Steampunk Gear Panel with clear embossing powder and Stampendous Aged Gold embossing powder. Love that some adhered to the canvas itself! My heat embossing was done as part of a cross promotion with Paper Wings Production And lastly, what are gears without a bit of Rub and Buff in Patina? 

My CE Art Flair was perfect to add to my project as the first word of my quote from Picasso .. "Art washes away from the soul the dust of everyday life." How much more relaxing can you get?  

Here are some close-ups: 


(BTW, photo credit to Maryjo Boughton Photography; snagged it off Pinterest!) 


And YES, this is now hanging right above my work table and I love the inspiration it provides!

 I hope that you can find time to play along with both these challenges this month! I did my project is just a few short hours one Sunday afternoon/evening! 


 Art Flair


Circle Bokeh Stamp


 Distressed Crackle Stamp


CE Inspiration photo


TCR palette #170

That's it for today! Thanks for coming by!!!!