Hi, there, scrappers! I am posting today with a quick tutorial on how I made this cute little shoe using the Scrap That! September kit featuring Graphic 45's Ladies Diary collection.
Just another photo of the original shoe!
My team mates at Scrap That! talked me in to doing this tutorial although I had another planned and ready. Therefore the papers are different on the second shoe I put together.
I've been wanting to make a shoe for a while now and have been collecting shoe templates along the way. The one I've used for this cute little number is found at Ellen Hutson's online store for a mere $2.00. I later found it for free but felt that the artist deserved to be paid for her template, wouldn't you agree?
This is the pattern for the lining of the shoe.
First, you cut your pattern out after tracing it on card stock for a permanent pattern.
Next, select a couple of co-ordinating papers.
Then, trace your pattern on your designer paper using repositional tape to hold it in place.
After you've traced it, you'll begin cutting it out. Be sure to leave your pattern on your designer paper until after you have begun scoring on the fold lines.
I did find that fussy cutting scissors helped to get in the corners.
I used a bone folder to make my creases nice and sharp. Accuracy is paramount! Once you have your folds done, you can remove your template.
Here is the liner after it has been cut and scored.
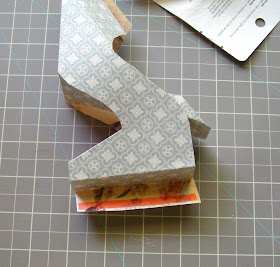
Next, I began folding and scoring the shoe itself.
Then you'll want to lift the instep so that you can put the heel together first.
Just checking the fit.
Using Tacky tape you can secure the heel before moving on.
I placed my liner in the shoe .. temporarily .. before I actually taped the toe of the shoe. Once the toe was secured, I re-placed the liner in the shoe.
Here is the shoe before it was embellished.
Lastly, just embellish to your heart's content.
Now, wasn't that easy? Why don't you give it a try?
Sandi C


Wow wow wow!!!! Just amazing!!!! I loveeeeeeeeeeeee them!!! Thanks for sharing how you put them together!!!
ReplyDeleteI say it's seriously cool!!!
ReplyDeleteThis is amazing Sandi love it so much!!!
ReplyDeleteSo elegant Sandi!!! Thanks for sharing!
ReplyDeleteSandi, I'd wear them both... lol!!! Beautiful job!
ReplyDeleteThese are totally adorable Sandi! What a cool idea and so beautifully made as always :)
ReplyDelete