
Happy Tuesday, everyone! Sandi here today to share with you how I made my Mixed Media on Glass project "Let the Good Times Roll." As I mentioned on Reveal Day, this piece was inspired by the work of Michelle Wilson and Miranda Edney. They both do such gorgeous work!

First I took the glass out of an old 8x10 inch frame and prepared it by cleaning it on both sides with rubbing alcohol. I was fortunate in that my piece of glass had very smooth edges. Some pieces have sharp edges, so please do be cautious when working with your glass.
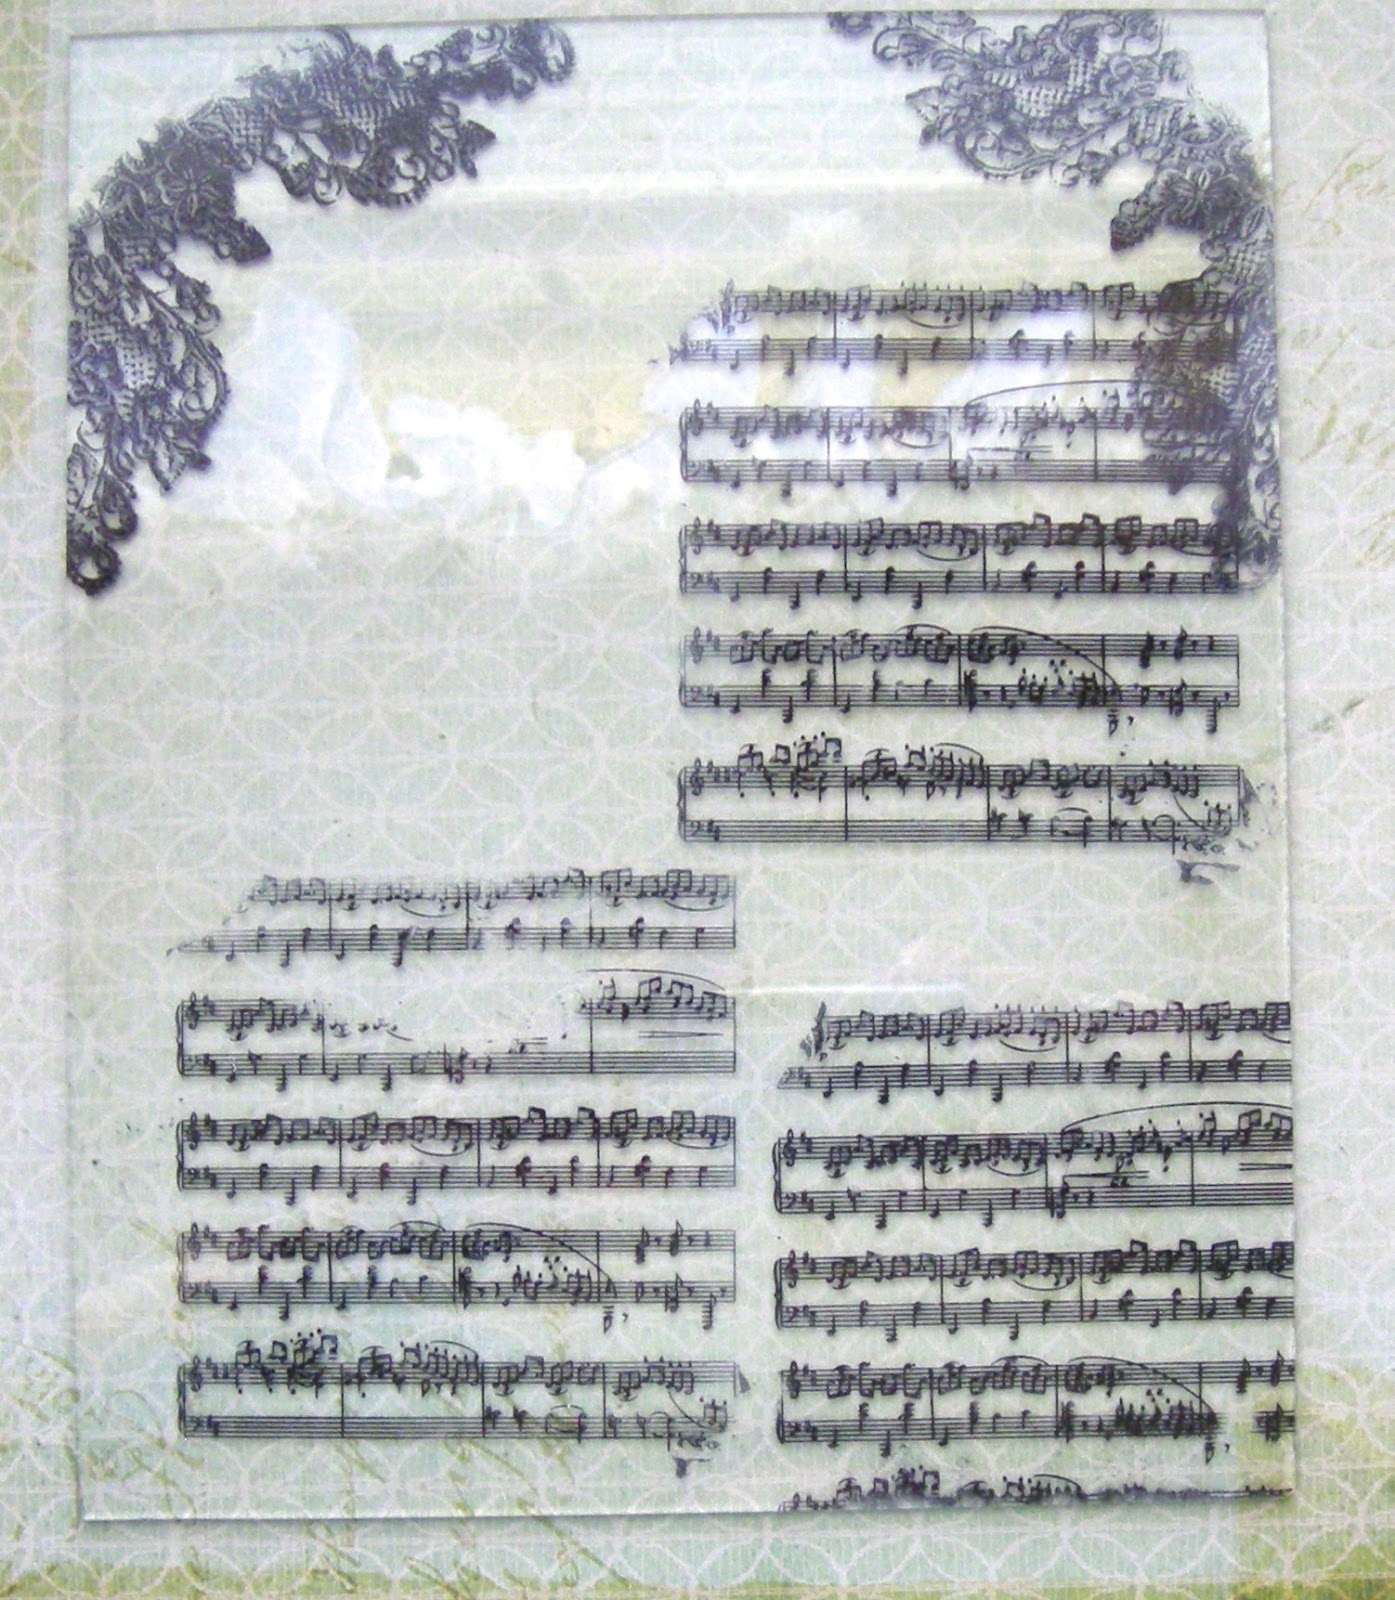
Next I did some random stamping using StazOn in black and 2 favorite Donna Salazar stamps, Garden Lace and Holly Harmony. Note that I did avoid inking the holly leaves on the outer edge of the Holly Harmony stamp.

My next step was to stamp all over the areas of the glass that I wanted to coat with Ulta Thick Embossing Enamel (UTEE) and my mist colors usingVersaMark Watermark being sure to leave an open area for my photo to peek through. Since this is translucent, the photograph really does not show where I've stamped.

Then I simply covered the watermark stamped area with my UTEE. Don't be stingy! Just sprinkle it all around. It will adhere to the watermark.

Then I used the heat gun to set the embossing powder. I did my heating from the underneath side of the glass to prevent the powders from flying everywhere since it covered such a large area. You do have to be patient at this step. I then tapped off the excess and returned it to my jar and gave the top side of the glass a few hot shots. It looks so frosty and amazing IRL! I love the look!

Now begin applying your mist colors. I used Lindy's Stamp Gang in Tiger Lily Red Orange, Tibetan Poppy Teal and Green with Envy Green as well as Dylusions Lemon Zest and Heidi Swapp Color Shine in Black Velvet. I added the Black last and somewhat sparingly but it sure kicked the project up a few notches!

Next select and trim the paper that you want to use underneath your glass. You can use an 8x10 portion as I did or you can be creative and use torn strips. Be as artistic as you like! I adhered my paper underneath the glass (but after I added my photo) using Glossy Accents along the outer edge where I knew my embellishments would be as well as few inner points.

Here is how the project looked after applying my paper and photo. I did try printing my photo on a transparency first but I did not have the right type of ink for it to dry properly. I think it would look amazing to do that and use torn strips of paper and let some of the glass remain open and transparent in a few places so that you could see right through your project! Next time!!!

Next begin adding your embellishments using a good strong glue such as Beacon's 3 in 1.
Alter your embellies as desired before adding them to your project.

Still not done! Just keep adding those pretties!!! I've used items from the current kit, past kits and from my own stash. I did computer generate a portion of my title and placed that under my Prima wood clip. Looks so cute!
Here is my final project along with some additional photos! I can't wait to try another one.
.jpg)


I hope you'll give this a try and have some fun! Be sure and let me know if you have any questions!
Wowwwwwwwwww! This is gorgeous!! LOVING that music note background and loveeeeeeeee the flowers!!!
ReplyDeleteSimply amazing!! ~ Blessings, Tracey
ReplyDeletehttp://gracescraps.blogspot.com/
Sandi this is WONDERFUL!! I loved reading it all - great tutorial - would love to try this - thank you!!!
ReplyDeleteI LOVE this piece! You have embellished this so beautifully! Thanks for sharing your process!
ReplyDelete