Friday, August 27, 2021

Sunny Day ~ 13 Arts Group Post ~ Stencils

 Hello, 13 Arts fans! 

Today the 13 Arts Design Team is sharing projects featuring some of our Stencils.

Of course, I use Stencils on almost every 13 Arts project but this time I used them 2 different ways .. with ink and with modeling paste. 


All my papers and ephemera are from the 13 Arts Sunrise collection. 
Some of the die cut images are fussy cut from the Art Book, Vol 1. 


I loved using the Feather and Poem Stencil with some brown ink even though I knew it would wick just a bit. I thought that added to the charm. 


Here is a little close-up of what I mean. 
I did seal it afterward with gel medium. 


I love getting to use the badges and chipboard on this project.
And of course, splattering white gesso everywhere. 


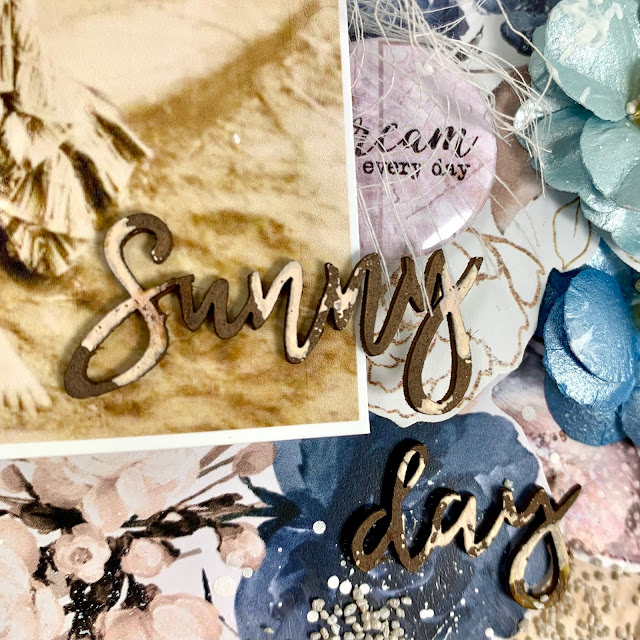
Just a better view of that Dream badge and the chippys which were inked and then were dabbed with white gesso. 


Love, love the butterflies in the Sunrise chipboard collection. I decided to reverse one of them and use them as a set, replicating a whole butterfly. 
These were altered using Burnt Sienna Chalk Mist as well as Pastel Cinnamon. 


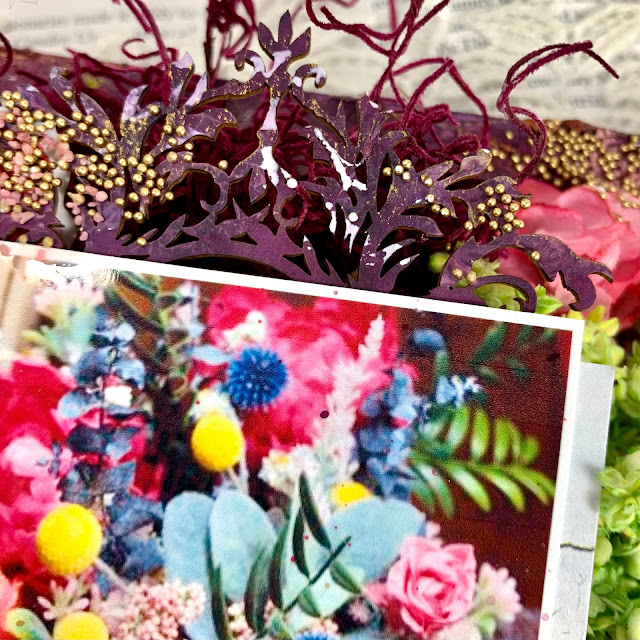
Here you can see some of the Roses with Branch Stencil which I used along with our modeling paste. I did the same technique above the photo as well. 

Lastly, I added some Fine textured Grit in the Color Light Gray which actually looks more tan to me. A nice color that will pair with many colors. 

Thanks for coming by today! 
See you in a few days! 

Sandi

#13artsfeatherpoemstencil

#13artsroseswithbranchstencil

#13artsmodelingpaste

#13artsbrownwaterink

#13artspastelcinnamon

#13artsburntsienna

#13artsfadedgraygrit

#13artssunrisechipboard

#13artssunriseephemera

#13artsartbook1

#13artssunrisecollection


Wednesday, August 25, 2021

As Time Goes By ~ Large Tag ~ Creative Embellishments

Hello, Creative Embellishments fans!

Wow, has this Summer flown by ... or what?

Sandi here with you today sharing my favorite thing to alter ... one of the large tags from the Large Tag Set.

Anyway, speaking of Time, I decided that I was in the mood to alter a Large Tag because it is such a perfect size for me to work on. These are about 10 inches high and 5 inches across.

I first chose my papers and these are from an old DCWV set felt right. They are similar to Graphic 45s French Country. Next I chose some coordinating ephemera from my Tim Holtz stash and decided a black and white photo might work best. These are my parents visiting my Grandparents farm in Indiana a very long time ago. They were young marrieds here.

Oddly, I chose my chipboard last but definitely before I actually started creating,  The Damask piece and the title piece were both painted with an Antique White paint. My Distressed Punchinella border  was stained with my fave Walnut ink and the Distressed Clock is actually left raw although it is very similar to the Punchinella.

You can see the punchinello peeking out at the top of this photo.

These last two photos are kind of similar but each has a unique angle of the chipboard and Flair. I chose a butterfly from the Fly Away Flair Set.

And that just about wraps up my post for today.

I hope you will check out the links below and snag yourself some artsy crafty fun!

See you next time!

Sandi

Chipboard:

Large Tags

Distressed Clocks

Distressed Punchinella

as Time goes by

Damask

Flair:

Fly Away Flair

Friday, August 13, 2021

Young Adult Card and Tag Set ~ Creative Embellishments

Hello, creative friends! 
Sandi Clarkson here with you today sharing a new Card and Tag set that's perfect for a young adult or anyone who might be envisioning new beginnings! 

I took two frames from the Oval Ornate Frames 2 set and altered them differently to demonstrate how your alteration can make a difference even with the same paper and embellishments. 


Here they are! 

Both were created using my fave 13 Arts Travel the World paper and ephemera collection. Hope you are not getting tired of seeing it! 

Each piece has a different frame but they are both from that Oval Ornate Frames 2 set which includes 3 frames. 

Love how these turned out! 


On the card, I cut strips of paper about 1.25 inches and layered them across my card base. That made a perfect backdrop for the gorgeous Oval frame. I used Tim Holtz's Salvaged Patina paint to alter the chipboard and then finished up with layered ephemera from my paper collection. To provide some texture, I added art stones of various sizes. 


Of course, as you can probably guess, I really like this tag because the chipboard frame was altered with Walnut Stain. Haha! Gotta love my walnut stain especially for an outdoorsy project. 

But hopefully, you can determine which technique works best for you. Ordinarily, I would have altered the set the same way but my purpose today was demonstrating how radically different the chipboard can change depending upon how you alter it! 

Thanks for coming by the blog today! 

There are lots of new items in the CE store if you need some retail therapy! 

See you next time! 

Sandi


Creative Embellishments products used: 


Saturday, August 7, 2021

Finding Love Again ~ Wedding Layout for Creative Embellishments

Hello, CE fans! 

Sandi Clarkson here with you today sharing my most recent project for Creative Embellishments

My gorgeous papers are all from 13 Arts, both the In Love and Dreamland collections. 

I was excited to scrap this great photo from my brother's recent wedding. He was widowed a few years ago as was his new bride. It is a blessing to see how God has brought them together after suffering such deep sorrow. I wish them many years of happiness. 

After prepping my background with clear gesso, I did some stencil work with modeling paste and the Small Circles Stencil. I used the transfer technique to add some color over random areas of the page. When that was dry, I added some stamping for more dimension, using the Distressed Moroccan Stamp.


One of my favorite new pieces of chipboard is the Bull Floral Scroll which I painted with Ranger's Evergreen Bough stain. I had actually planned to use 2 of them but changed my design idea as I was creating. Instead I opted to used the House ATC from the Family ATC Coin set. 


Here is that cute little House Coin as well as some of the Mini Leaves Set 1 which were altered the same way as the House and Bull Floral chipboard. 


I also used the Together coin from the same set as my title piece. Before adding the Evergreen Bough, I painted it white for a slightly different tonal affect. 


The Distressed Moroccan Stamp is always a winner in my book. I love it almost as much as my beloved Circle Bokeh stamp. 


Some white gesso splattering for blending and this one is all done! 

Thanks so much for coming by today! 

See you next time! 

Sandi


Creative Embellishments products used: 

Chipboard: 

Bull Floral Scroll

Family ATC Coin

Mini Leaves Set 1

Stencil: 

Small Circles Stencil

Stamp:

Distressed Moroccan Stamp


Sunday, August 1, 2021

13 Arts August Challenge #105 ~ Floral Canvas

Welcome to August 1st, creative friends! 
Today I'm  sharing my Design Team take on the August moodboard over at @13Arts Instagram account. 
I've shared the moodboard image below and want to reassure you that once you dive in and start, the creativity will flow! 
I am not a bright rainbow-colored creator but with the right photo and products, I now have a lovely canvas to brighten up my creative space. 


First I created my crackle with 13 Arts modeling paste mixed with texture paste. I also let it sit overnight but this time it actually sat for 2 nights due to my hectic summer schedule. 

I painted on my base colors: olive green water ink, pearl gold mist, pearl pink mist to achieve the hot pink, and finished with a mix of pastel dirty pink mist along with violet water ink.

Because I wanted to include the pop of bright blue, I colorized some white 13 Arts ribbon with the pastel cobalt mist. 


When everything on the base area was good and dry, I made a couple of different custom metallic waxes with the Amber Color Glow and the Rubelite Color Glow. I love rubbing the metallic wax on my background to provide highlighting of the ridges and valleys. 

I finally used some awesome lime green dried flowers from 13 Arts to provide a base under my photo. Once that and the ribbon was secure, I began tucking ephemera and 3d florals all around. The bright pink floral ephemera was from the Victoriana collection ... of all things! 


I included the awesome frame from the Victoriana chipboard which I painted with the Rubelite Color Glow. 
To balance my focal point, I added this cluster on the left and included a piece of the chipboard here as well. 

I tucked in purple dried roots here and there over the canvas for additional texture. 


To ramp up the texture even more, I've added gold microbeads and pink fine grit both from 13 Arts. 


When all the beads and grit were adhered, I dabbed and splattered white gesso for a finishing, blending touch! 


And of course, so many flowers! 

Below is the Challenge image! 
I hope you will play along. 
Be sure and use the hashtag #13artsAug2021


Thanks for coming by today! 
Sandi


#13artsmodelingpaste
#13artstexturepowder
#13artsambercolorglow
#13artsrubelitecolorglow
#13artsolivegreenwaterink
#13artsvioletwaterink
#13artspastelcobalt
#13artspasteldirtypink
#13artspearlpink
#13artspearlgold
#13artscustommetallicwax
#13artsgoldmicrospheres
#13artsvictoriannachipboard
#13artsfadedpinkgrit
#13artsvictoriannaephemera
#13artsinbloomephemera
#13artsinloveepehemera
#decoupagewax
#driedroots
#13artsdriedflowers
#13artswhiteribbon
#8x10canvas