Wednesday, September 22, 2021

My Passion ~ 13 Arts

Hello, 13 Arts fans! 

Sandi here with you today sharing my most recent creation with the new 13 Arts Carmen collection. 

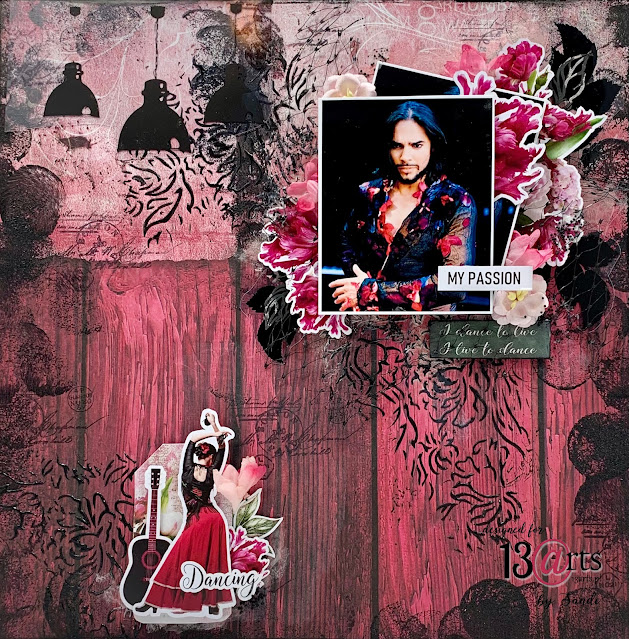
I had found a few awesome publicity photos of the Spanish dancer Joaquin Cortes and thought they would be a powerful way to feature this gorgeous collection. 


First I prepped the center of my paper with clear gesso and then went around the edges of the paper with Black gesso and a dabbing tool. I did the same to the left of the photo. 

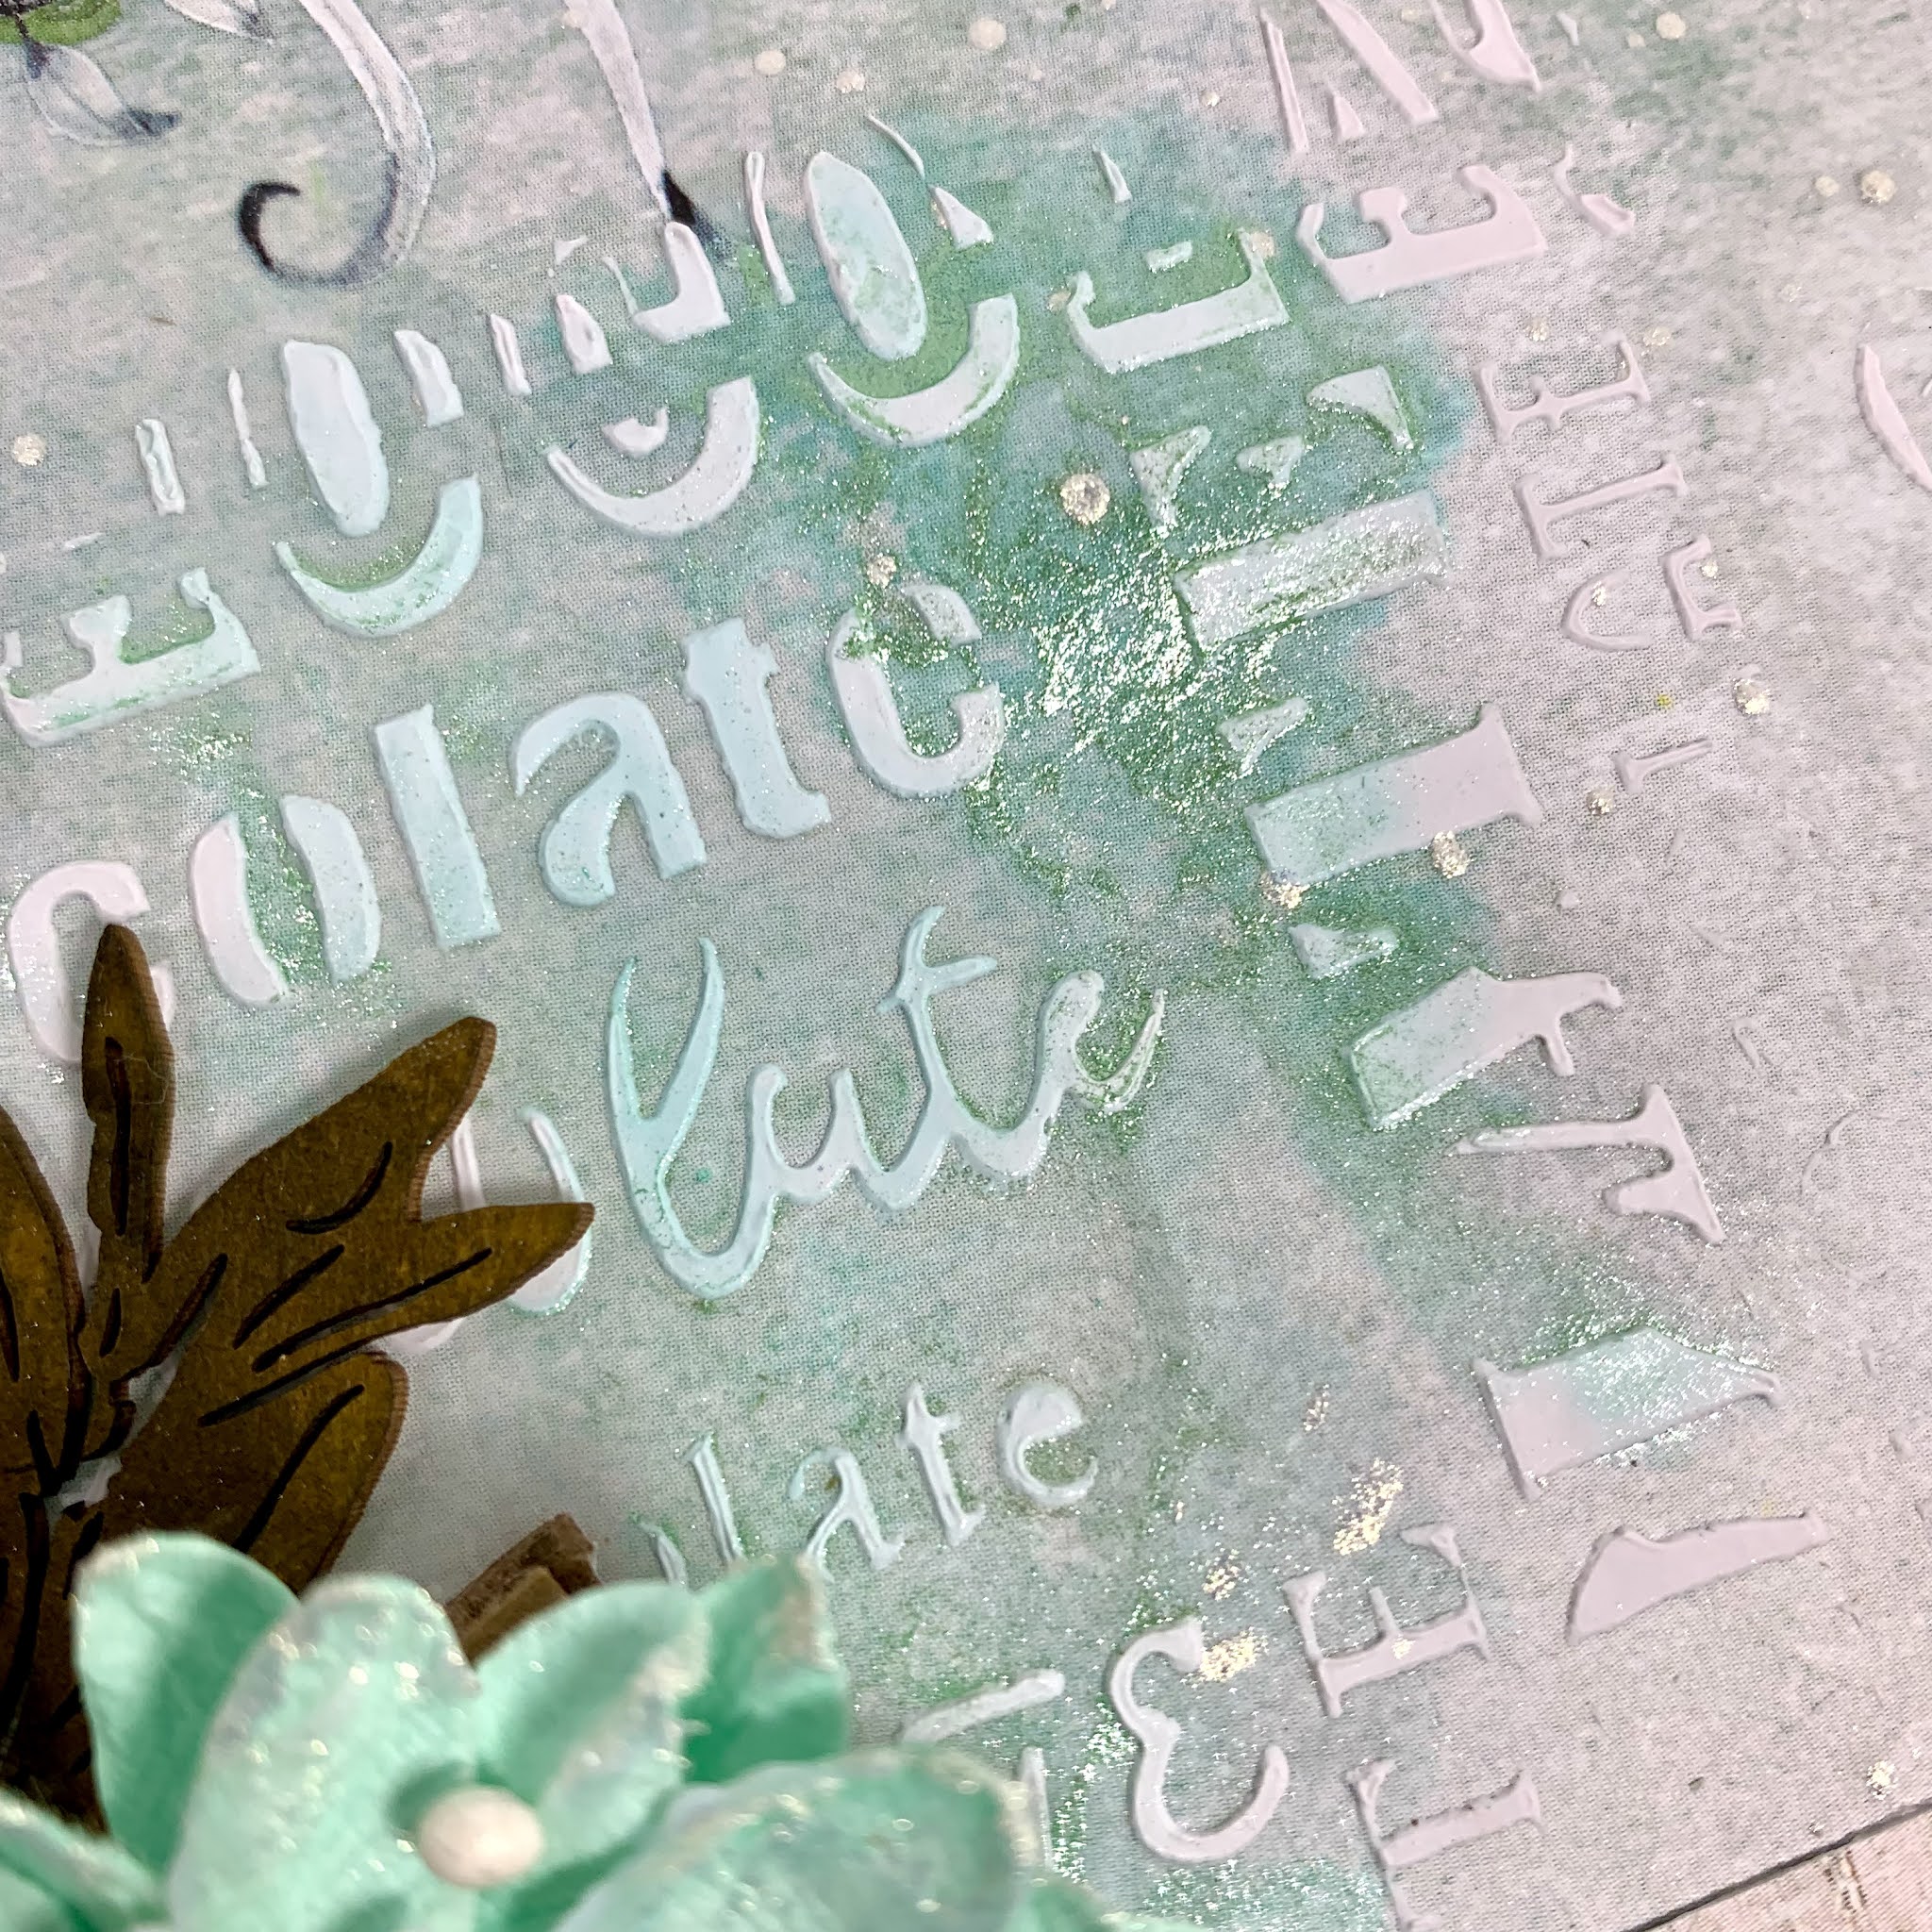
When that was dry,  I pushed the Black gesso through the Flower Power stencil somewhat randomly. Later I randomly stamped with the postage image from the new Back in Time stamp. I think this one is going to be my new favorite stamp! 


I wanted to make use of the fabulous transparency that coordinates with the Carmen papers and fussy cut the hanging lights as well as the black leaves to tuck into my floral area. 


I also took a few leaves from the Carmen chipboard and painted those black, then dabbed them with the new Rose Quartz Color Glow. 


In this photo you can see the stamp in the upper right corner. 
I had fun creating this small cluster at the bottom of my layout 


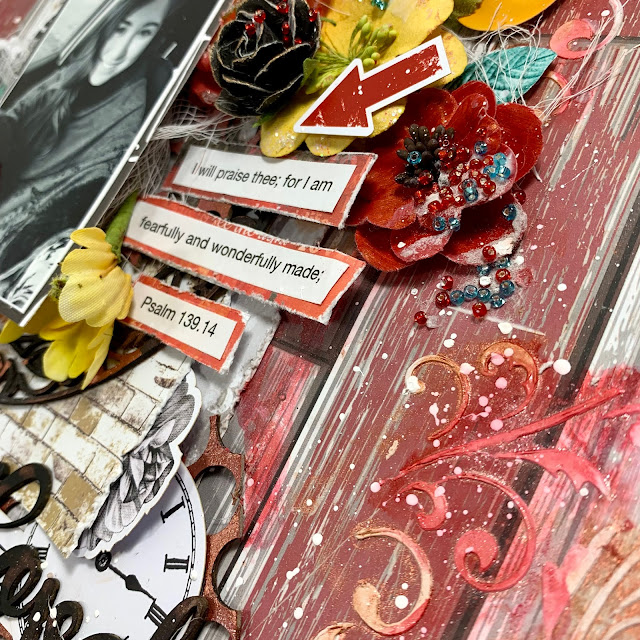
I added one of the stickers from the collection and raised it with corrugated cardboard backing and tucked it in under some netting that I've used under the focal photos. 


The ephemera florals are so wonderful and there are so many that you can fussy cut from the paper pad as well as from the Art Book Vol 3. Additionally, I tucked in a few 3 dimensional flowers but it really isn't a necessity as the Carmen florals are just amazing! 


My title is from the Carmen Ephemera package. I read that Dance was indeed this fellas passion. 
To enhance my focal area, I've used some of the new Rose Quartz Color Glow. 


Lastly, I added a few black microspheres for additional texture. 
You could also do some paint splattering but it really didn't seem necessary. 


Here is a collage of some the primary items used although the Black gesso was also a key player this time around. Not something that I use too often! 

Thanks so much for coming by! 
I hope you feel inspired to create. 

See you next time! 
Sandi


Monday, September 20, 2021

Mixed Media Monstera (Palm Leaf) Home Decor piece ~ Creative Embellishments

Hello, Creative Embellishments fans! 

Sandi Clarkson here with you today sharing my latest creation for CE Design Team.


As you may have noticed, many of us on the Design Team have really taken a liking to the Home Decor section of the CE store. Here you will find birch wood pieces in many different shapes. These are mostly 3/8 in thickness and make a perfect but unique surface upon which to create.

I made up a crackle paste and laid that down as a base one evening on my Palm Leaf and let it dry overnight. I also added some 13 Arts Glass Beads in the mix. The next morning I began tackling my exact color. Since I've done Olive Green quite a bit lately, I decided to try for a cooler green this time. 

My colors were obtained with 13 Arts Color Glows: Emerald, Amber, Smoky Quartz along with the Chalk Sap Green Mist. I also added a tiny bit of my Olive Green Water Ink in a few random areas. 
I am very pleased with how it turned out. 


I am crazy in love with the new-ish Fancy Filigree Flourish 
and have used it as a photo layer in the top left section of my altered leaf. It is so intricate and I adore all the various pretty swirls. I've altered it with 13 Arts Smokey Quartz and although it looks brown on the chipboard, it also has the most goreous silvery sheen to it. It really sparkles! 


Under all my photo layers I added some colored moss for texture. I used some fave 13 Arts In Bloom ephemera as well. 


For even more texture, I tucked in a random gold lace bit from Prima. 
Here you can also see some of the glass beads as well as my 13 Arts Gold microspheres and green mica flakes. 


On the bottom right of my leaf, I tucked in the flourish 18
which was altered the same as the aforementioned swirly flourish. 
I also created a custom metallic wax with Decoupage wax and my Amber Color Glow which I dabbed on to create some highlights on the ridges and so forth. 


Because my ephemera was floral in nature, I only need a few 3 dimensional blooms which I've tucked in a few places. 


And here is the last photo where you can see some of the color variations. 
I love me some Olive Green but sometimes, a girl needs to branch out and try something new, right? 

As for now this Home Decor piece is sitting in my craft room and inspiring me. Eventually I will turn loose of it and share it with a family member or friend. Such is the life of a paper crafter/mixedmedia artist. 

Thanks for coming by today. 
Check out the Creative Embellishments retail list below. 

Sandi


Creative Embellishments products used: 

Chipboard:

Fancy Filigree Flourish

flourish 18

Home Decor: 

Palm Leaf


Friday, September 10, 2021

Lovely ~ New layout for Creative Embellishments

 Hello, Creative friends! 
Sandi Clarkson here with you today sharing my newest creation for Creative Embellishments.


I went a little wild and crazy with the colors on this one but I was in the mood for something vibrant and different. When strolling through my 13 Arts papers, I came upon the Young and Free collection which I have not used all that much. 

M first choice of chipboard was the smallest of the Ornate Circle Frames. I decided to paint this black as well as the Distressed Circle Border. Later I highlighted these pieces with 13 Arts Golden Calcite Color Glow. 


While these were drying I prepped my background and did some stencil work with the Flourish Stencil 3.  For accents, I added some Garnet Color Glows using the transfer technique as well as moving with water. 


When modeling paste and Color Glow was dry, I added some papers from the Young and Free 6x6 paper pad and placed my photo on multiple layers of corrugated cardboard, placing it inside the Ornate Circle Frame and slightly to the left. 


For my title I choose the word Lovely from the Girl Word Set. It was altered the same as the other 2 black pieces and was mounted on some ephemera from the Young and Free collection. 


I was also wanting a little something for tucking in my clusters, so I used scraps from the Punchinella Panel and these were accented with the Golden Calcite Color Glow from 13 Arts. 


I continued down my wild and crazy color path and chose florals that would work with my color scheme. Additionally, I've used some great ephemera pieces from the Young and Free collection for further accents. 


Before wrapping up I added some red and turquoise seed beads and some fine sand grit. I probably could have deleted this step but I'll let you be the judge! 


Because this is a photo of one of my granddaughters, I wanted to add a Bible verse, I am hoping to do more of this in my crafting. 

I finished the project with watered down white gesso splatters. 

And that is it for today! 
I've provided all the links below to the various Creative Embellishments products. 

Thanks for coming by! 
Sandi


Creative Embellishments products used: 

Chipboard: 

Ornate Circle Frames

Girl Word Set

Stencil: 

Flourish Stencil 3

Tuesday, September 7, 2021

Home is Where the Heart Is ~ 13 Arts

Hello, creative friends! 

Today I'm sharing my newest layout created for 13 Arts  Design Team using the NEW Home Sweet Home collection. 

I just received my box of newly released products a couple of days ago and it was SO hard to decide what to feature first. Since some of the other collections have gotten some press, I turned to the gorgeous Home Sweet Home collection. Although it was released with the cooler months in mind, it is also all things cozy and home-y! 

Interestingly, I choose a photo taken of our "missionary family" right before they left for the mission field and certainly for them, home is wherever they are as a family! 


I am so in love with the striped paper in this collection called Evening with Family and I paired it with the gorgeous Frosty Morning paper. 
After prepping my papers with clear gesso, I added some stenciling with modeling paste and the Chocolate stencil. Later I added color there with the new Turquoise Color Glow. Yummy! 

Also, I did some random stamping with the Home Sweet Home stamp. 

I deviated a bit on this project and actually composed the lower corner before I actually worked on the primary focal area. I wanted to create a little "reading nook" design with all the great ephemera in the ephemera packet. So fun to do! 


I cut out a couple of tags that were from the back cover of the paper pad and used those as photo mats. I also tucked in a Sticker and covered it with a cabochon. Of course, I added some florals and art stones at the end. 


My chipboard title was colorized with the new Goldstone Color Glow! Wow, I've needed this one in my life, ha! Actually, all the new colors are SO gorgeous! 


The leaves were colored with my fave Olive Green Water Ink although the watercolor set would work as well. 


And my sweet little nook area. This could actually be representative of Maddie's private time or of those of us back home praying for them. Especially her momma. 


Just another little corner of interest. 


And lastly, I close-up of some of the stenciling and color work. 

I hope you liked my layout and all of these items except for the actual florals are available at the 13 Arts online store. For those of us in the USA, I know that Bluemoon Scrapbooking usually carries 13 Arts products, so you could check there first if you like. 

Thanks so much for dropping by! 
See you next time! 

Sandi


Wednesday, September 1, 2021

Oh! The Places You'll Go! ~ Creative Embellishments

Hello,  Creative Embellishments fans! 


I can hardly believe that it is already September and yet here we are once again! Wow, this month's Challenge project came together SO quickly for me this time. 

Sometimes it helps to have a specific theme and color palette. The photo was taken by my granddaughter on a trip to Ecuador. I thought that the Oh! the Places You'll Go! chipboard title was perfect for my layout and I chose the Twig Frame with Fall Leaves frame to ground my focal point. 

To add more dimension, I used the Time Flies Frame Set under my photo. Additionally, I used the Rivet Stencil to add some ink and also completed the layout with some random stamping using the Circle Bokeh Stamp. Those two things were actually done prior to adhering my embellishments. 

Walnut Stain was used to alter all the chipboard along with a few waxes. All my papers, including the map paper, are from 13 Arts Down Under collection. 

Here are some close-ups for you:


I hope you enjoy the Challenge as much as I did.
Retail links are listed below. 

Here is the Challenge image: 


Thanks for coming by today! 

See you soon! 

Sandi


Creative Embellishments products used: 

Chipboard:

Oh! the Places You'll Go!

Twig Frame with Fall Leaves 

Time Flies Frame 

Stencil: 

Rivet 

Stamp:

Circle Bokeh Stamp