Friday, October 21, 2022

Autumn Memories ~ New Layout for Creative Embellishments

Hello, scrappy friends! 

Sandi Clarkson here with you today sharing my newest project for Creative Embellishments

This project has been on my desk for awhile now but I finally made an appointment with "me" to sit down and lose myself in the mystery and wonder of the creative process. 

Anyway, I wanted to create using Autumn colors and chose this sweet photo of my twin grandsons back when they were small, walking in the leaves. So cute! 

For my papers, I've used 13 Arts awesome Industrial Zone collection. I really didn't do any mixed media this time outside of some random stamping with the Circuit Stamp and brown archival ink from Ranger. Because I had settled on using some burlap ribbon for my background, I felt that stenciling with modeling past might be too much. Same with focal color. 


But I was more than ready to get after my Autumn themed chipboard, that's for sure! 
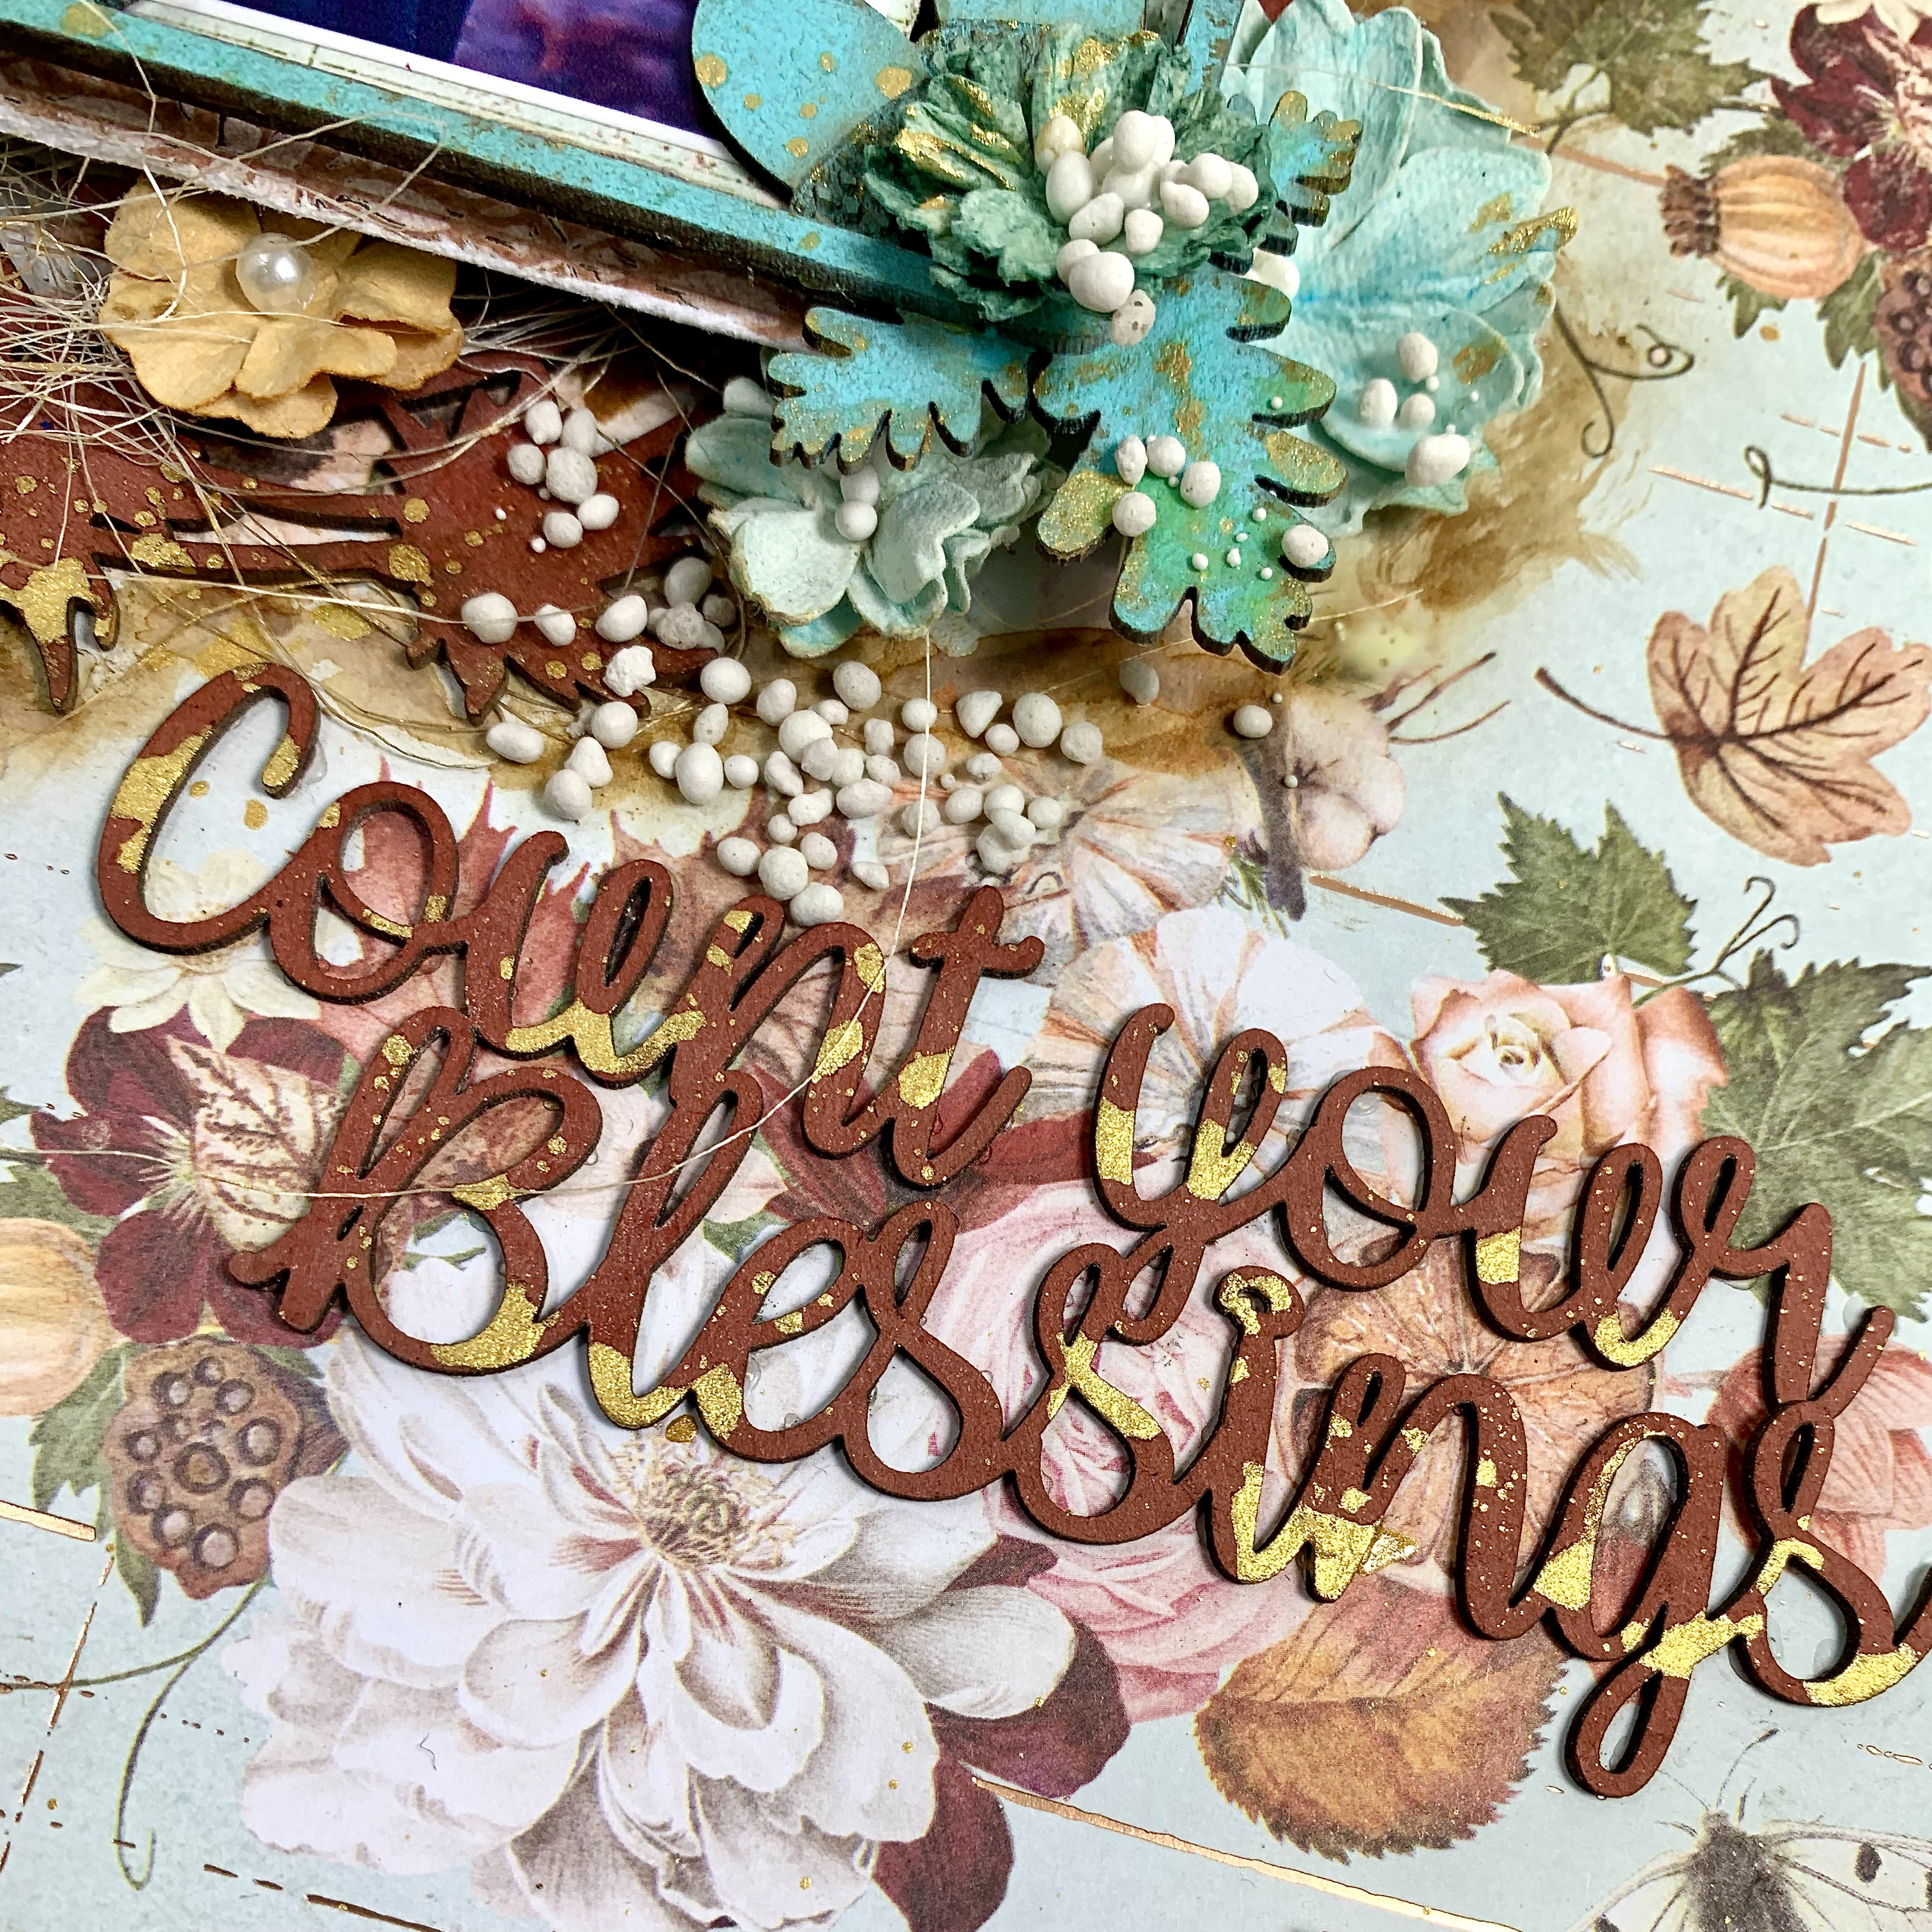
I gave everything a good coat of walnut stain from Ranger and then used custom metallic wax along with some Tim Holts distressed oxide inks from Ranger for color: Wild Honey and Crackling Campfire. 


To bring the eye to my photo, I used the Circular Twig Frame which created a bit of a base for some of my other elements. I always enjoy creating with the Acorn Clusters this time of year, so I placed 2 of those on top of the frame using foam squares for dimension. 


Before going too far, I added a few pieces of Industrial Zone ephemera here and there for balance and interest. I was careful to tuck in the ATC that says "Autumn" before adhering my Acorn Cluster on the right of the photo. This ATC as well as the one on the far right of the page, are from the Autumn Artist Trading Coins set. I decided to cut and offset the Coin on the right and made a little cluster with leaves from the Branch and Leaves set. I scattered a few more of those leaves around the focal area. 


And of course, I needed some flowers, right? 
I chose some from the Rustic Bouquet, Marigold set by 49 and Market. 
Perfect colors and texture for my piece. 


I finished with some gold microspheres from 13 Arts and some flat-backed pearls from BoBunny. 


Here are a few more close-ups: 


I hope you feel inspired to create regardless of your circumstances. 
Creative Embellishments products used are listed below. 

Thanks so much for dropping by the blog today!  

See you next time,

Sandi


Creative Embellishments products used: 

Bedhead or Dryad ~ October Layout with Sandi for Creative Embellishments

 
Happy October, y’all! 
Sandi here and I'm sharing another throwback with you today!
 
Bed Head or Dryad? Either way, you need a little coffee in your life! Right?
 
 Anyway … although I rarely do black and white layouts,  I was really feeling this photo.  In Greek mythology, Dryads were the Forest Fairies but in 2020, this represented all things Bed Head to me and maybe even 2020 in general. It was a doozy. 
 
Despite all that, I had lots of fun with my chipboard pieces: Leafy Vine Frame Life Happens Coffee Helps Flourish Butterfly Set 2 Typewriter Keys Alphabet Blocks and Alphabet Game Pieces. The great thing about the alphabet sets is that you can create your own custom titles. 

Here are some close-ups: 


That's about it! 

Here was my inspiration photo: 


See you soon!
Happy Creating!
 
Sandi


Creative Embellishments products used: 

Friday, October 14, 2022

Count Your Blessings ~ New layout for Creative Embellishments

Hello, Creative Embellishments fans! 

Sandi Clarkson here with you today sharing my newest Autumn layout for Creative Embellishments

You may remember that I've been busy caring for my husband and have had to put my art on the back burner. But that need to create was just bubbling over, so I decided to make time for it. 

And guess what? I felt whole again. 

Creating is more than playing with pretty things; it is a way to feed one's soul and express yourself. It can be powerful medicine for the artist. 


I just adore these older Pumpkin and Spice papers from Prima Marketing and haven't had much opportunity to really use them. So, playing with them was really fun! 

This time around I went with a stock photo from Unspash to reduce the pressure of designing around a friend or family member.'s photo. A stock photo is more effortless because your imagination can go any direction. 


I started with the Fall Frame 2 which is actually a base layer for my photo. I used 13 Arts Burnt Sienna mist to alter it and then splashed some gold metallic spray over it. I stroked some fine lines to help bring definition to the leaves. Of course, per usual most of that got covered up! 

Next I double matted my photo and elevated it with multiple pieces of corrugated cardboard. 

Now, let's talk about this awesome Autumn Frame Set. I used both pieces of the set and glued them together because I wanted both the wording as well as the acorn clusters. These were altered using Tim Holtz Cracked Pistachio Oxide. I first experimented on a random piece of cardboard to ensure the color came out as I wanted. I've splashed again with the gold paint. 


After adhering the Fall Frame 2 as a base, I made a nest of ecru sisal and adhered my photo layers on that. I thought it was the perfect texture to go along with the little pumpkin basket in the photo. 


This is how the Fall Frame 2 looks along the top and under the Autumn Frame Set. 


I always love using a chipboard title when I can and as fate would have it, this Count your blessings title was in my "Autumn" folder of chipboard. Yes, I keep my chipboard organized in hanging folders. It isn't always perfect but it helps me stay somewhat organized with the abundance of chipboard I have in my stash. This piece was altered with the Burnt Sienna as well. 


Flowers almost always help my projects come together especially since I lean toward "pretty." It bring all the colors together and fills in the holes. Additionally, I added some fussy cut pieces in the lower right hand corner of the layout. 


I finished with more splashing of paint as well as adding some Art Stones and colorizing around the focal point with Vintage Photo Distress Ink. It turned out pretty good considering that I'm a bit rusty from not creating in a while. 

Hopefully,  I've inspired you to sit down and create ... just for fun! 
As Picasso said "Art washes away from the soul the dust of everyday life."

Thanks for coming by the blog today! 

See you next time! 
Sandi

Creative Embellishments products used: 
Chipboard: 


Friday, October 7, 2022

Home Decor Leaf ~ Creative Embellishments

Hello, Creative Embellishments fans!
 
I'm excited for today's Throwback post!
And thanks for bearing with my older projects while I am busy caring for my husband.
 
Sandi Clarkson here sharing another Home Decor piece for Creative Embellishments.
These Home Decor pieces are made from 3/16" plywood and are perfect for altering or in some instances, for using bare to showcase multiple layers of decor.


I knew right away that I wanted to order the gorgeous Large Leaf piece as soon as I spied it in the CE storefront and do something Fall-ish with it. However, when it arrived, I liked it SOOO much "as is" that I waited awhile before altering it. In the end, I knew it would be awesome once I started adding some Fall touches to it. But I most certainly will order another one simply to use "naked."

 
After deciding what direction I wanted to rotate my piece, I applied a thick layer of crackle paste and allowed that to dry overnight. You will get the best crackle effects if you allow it to air dry.
 
Once my crackle was dry, I began adding color using my 13 Arts water inks in olive, brown, yellow amber as well as my Woodbine mist. I painted all of it with a brush and dried each color separately but knowing that they would blend somewhat without letting them get too muddy.
 
It was so hard to decide on a photo but ultimately another horse photo took the win.
I felt the photo needed some strength to balance out the dark background.
 

Tucked under my photo is a blackened Punchinella Panel. I had planned to use my Punchinella Pieces but couldn't find them quickly enough. So much for my great filing system! So I just cut away a section of the panel, painted it and tucked it under the focal area.


I've also used a couple of pieces of the Acorn Clusters which were painted brown with olive green leaves. Then I added some waxes and some more paint to give them character. I tucked one on the upper left and one on the lower right of the photo.


For my title piece I used the word Together from the Family Word Border Set. It was also painted black and accented with gold wax.
Ahhh, don't you love that crackle?!


As far as further embellishments I used some green roots, a metal key and a bow from last year's ribbon.
Here is a close-up of the focal area.
 
I finished off the piece with some splattering of gold paint and Ranger's Wild Honey.
 
 
This Decor piece was so, so fun to create!
The stars must have been perfectly aligned because the whole process went so easily and creating was just a dream.
So relaxing!
 
Thanks so much for coming by.
 
 
See you next time!
Sandi


Creative Embellishments products used: