Sunday, May 25, 2014

~Today was Amazing ~ for Creative Scrappers ~


Today the Design Team at My Creative Scrapbook is participating with Creative Scrappers in their Sketch Reveal #269.  My Creative Scrapbook has been honored to be their May Sponsor.  I'll let you visit the Creative Scrappers blog to snag the sketch and see what the rest of the Design Team has done! Of course, I took a bit of creative license! It was pretty linear and had lots going on, so I simplified it a bit but tried to keep the same basic design! 

My sweet photo is from a recent family photo of my dgd and her little family! All my products come from the June Limited Edition Kit from My Creative Scrapbook except for my mixed media items. 


Instead of squares, stars and circles, I opted for some dimensional triple layer butterflies that I cut with my Cameo. Now mind you,  I still haven't taken time to learn all that it can do but I was able to cut this fun butterfly shape! I stacked them with foam squares and lifted the wings. The pix really don't do them justice .. they definitely have that WOW factor! 

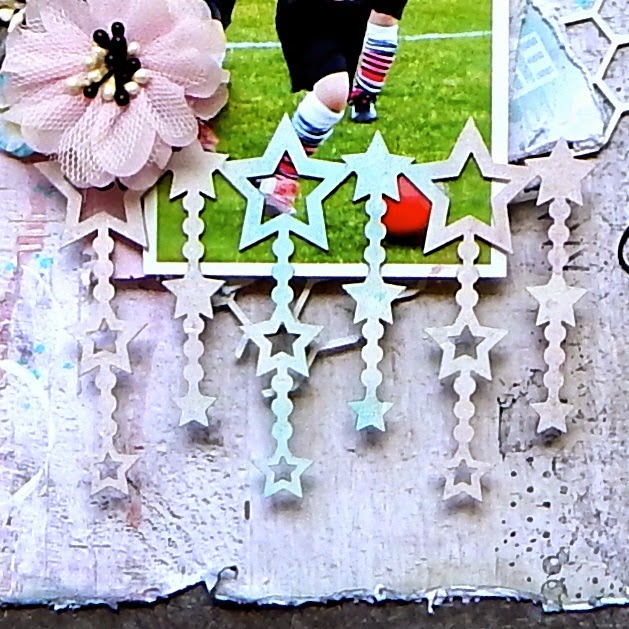
You can also see a bit of the stenciling with molding paste and misting with my new Prima Bloom Sprays. And lots of gesso splashes! 


I took one of the note cards as a title and elevated it with corrugated cardboard!  


One last look at one of my "let's get messy" corners with one of the new Prima Bloom sprays! 

Thanks for coming by today! 
And thanks to Creative Scrappers for having us join along! 


Wednesday, May 21, 2014

Exciting News! 7 Dots Studio GDT

Happy Wednesday, everyone! 

 7 Dots Studio announced their new Design Team this morning … and while I am not on the Design Team, I am over the moon excited to say that I will be Guest Designing for them in February, 2015! 
I still haven't quite absorbed the news! 

Here is the new Design Team for July-December 2014.

DT coordinator - Keren Tamir - Canada 
Louise Nelson - Australia 
Wiosanka - Poland 
Riikka Kovasin - Finland 
Frau Muller - Ukraine 
Melenia Agapides - Greece
Sandi Smith - Canada 
Elena Olinevich - Belarus 
Irina Gerschuk - Russia 
Elena Morgun - Russia
Anna Rogalska - Poland 
Anna Komenda - Poland 
Nadia Canizzo - Australia
Ebony van der Starre - Australia 
Stephanie Papin - France 
Tanya Dudkina - Ukraine 
Pascale D - France 
Tatyana Sidorenko - Belarus
Helen Tilbury - South Africa 
Marilyn Rivera - USA om
DeeDee Catron - USA 
Belladonna Poland 

Guest Designers Team
Tara Orr - USA
Dorota Dołęga – Poland/France
Sylwia Gryczuk  (Tandi Art) - Poland/Ireland 
Maja Stokk - Swedene
Daria Pneva - Russia 
Tanya Palamarczuk - Ukraine 
Solange Marquez - Brasil 
Sandi Clarkson - USA 
Anita Stokes - Australia 
Marta Lapkowska - Poland/Ireland 
Francine Westmoreland - United Kingdon 
Wilma Voermans - Switzerland
Karen Knight - Australia 
Lisa Gregory - USA 

Is that an amazing group of artists .. or what?? 
Congratulations to the new Design Team!! 

And thank you, Tusia, for giving me the opportunity to Guest Design for you and 7 Dots Studio!!

Tuesday, May 20, 2014

~ Amazing ~ Creative Embellishments~


Hello, crafty people! Thanks for coming by today! 

I have something a little different than my "norm" today … a Soccer page! Yep, first time that I've scrapped something Soccer, I think, other than the good ole Creative Memories way!  But I had this sweet, new photo of our tiniest Soccer champ, dgd Marianne. Now her age category doesn't quite "get" all the rules of the game but they sure can be fun to watch! 

Anyway, I grabbed me some 7 Dots Studios Cold Country papers and went to town on my background with the drippy inks, molding paste, stencils and stamps. I love getting messy! Of course, my new Creative Embellishments stamp helped out as well!

 I've chosen 4 Creative Embellishments products to use:  Hot Hexagon PanelFalling Star BorderAmazing title and the Disstressed Corner stamp. All my chipboard items got a coat of white Gesso to start.

The Distressed Corner Stamp was perfect for helping to build my background! It also creates movement across the page! I opted to leave the Hexagon Panel plain except for the Gesso and a few hints of chalk ink in pink, blue and gray. It reminded me of netting, so I thought it would be ideal for this sports-themed page. These CE chipboard panels are so great for adding interest and creating an additional layer. 


I cut my Falling Star Border apart and used just enough to fit nicely along the lower edge of my photo.  After priming it, I misted it in blue and in pink .. I just wanted a hint of color, nothing bold, and let it pool on the chipboard.  Some embossing powder would have looked great but I really didn't want to go "shiny." And don't you love that Manor House bloom that I've had forever and finally used?! It goes great with my photo and papers!  


Here you can see the Distressed Corner Stamp in action! Love the little dots! Love it all actually! 

And to treat my Amazing title piece, I simply Gessoed and then inked in a few colors before opting to finish with a dark charcoal gray. Love this font! 

That just about wraps it up for today. Thanks so much for coming by! Be sure and check out the STORE and see what's new! 


Tuesday, May 13, 2014

She's So Beautiful ~ Creative Embellishments


Hello, Creative Embelllishments fans! Hope your week is off to a good start! 

Today's project featuring sweet granddaughter Peyton is a layout that was totally inspired by some yummy Prima flowers (Jardinere Romantique) that I was wanting to use! The rich warm reds, golds and aqua were impossible for me to resist! Along with that, I'd been itching to use the Creative Embellishments Out of This World Frame. Frames are one of my favorite chipboard items because they instantly take your focus to the photo as well as being a fabulous layering piece. 

And I love having the instant title work done for me with chipboard! Today I've used She's So Beautiful.  My frame and title were basically treated the same way … gesso and then chalk ink in two colors to give me an ombre effect. It can't get much easier than that! Because I wanted to place the word "She" on my frame, I made it a bit darker. The beads of the frame have been lightly touched with some Clear Gesso to make them shine a tiny bit. 


In this close-up, you can see the background work I did with a Prima crackle mask, modeling paste and ink. I also did some random stamping here and there with the Binary stamp.  I wanted a tiny bit of a flourish for my floral cluster and decided on another piece instead … the Ornate Christmas Ornament! It was treated with just a bit of chalk ink and a tiny dab of Stickles. 


Lastly, here's a close-up of the right hand corner design. 

Thanks for coming by today! I hope I've sparked a tiny bit of inspiration your way! 


Thursday, May 8, 2014

Sandi's May Tutorial for My Creative Scrapbook

As seen on the My Creative Scrapbook Blog today … 


Hi there, My Creative Scrapbook fans! Sandi here with you today to share one of my design details using the fabulous May Limited Edition Kit.  Do you like the little window around my photo? Well, this is how it happened! 


As I started working with my Kit, I popped out all the Prima Princess chipboard elements so that I could see which ones I might want to use with which particular photos and papers.  I don't always do that but it just happens that I did this time around. 


After I did that, I glanced at the four squares in the upper right hand corner and "saw" a little window! Not realizing that I would actually want to use it, I just trimmed it out by hand.  Looking back, I might have been better off to use my guillotine trimmer but in the end it didn't really matter at all. 


I had this photo already printed out and some paper and flowers chosen. The May Limited Edition Kit had 3 packages of Prima flowers .. swoon! Heaven! 

But anyway, I placed the "window" over my photo with the backing still in place and saw that it looked pretty good. The little wooden bird icon mounted at the top was perfect for hiding my hastily cut chipboard. And the title piece along with some flowers would work fine for covering the bottom. 


Knowing that I could always re-pinrt my photo if needed, I went ahead and committed! Then I used my craft knife to trim away the excess .. focusing on my lovely bride and offsetting the windowpane just a bit in one direction so that it did not cut her right between the eyes. =) 


Then I kind of played around with some embellishments to make sure I was ready to glue this to the page.  


And here again is the finished project! It just goes to show you that even your scraps can make for a wonderful page! 

Thanks for dropping by today!


Monday, May 5, 2014

Reveal Day!!! My Creative Scrapbook May Kit Reveal (Limited Edition)


Happy Reveal Day, My Creative Scrapbook Kit fans! Did you have a great National Scrapbook Day weekend? 

I'm here today to share my creations using this gorgeous kit. It was full to the brim with Prima gorgeousness! Here's a quick look:


Can I just say yum-my??? 

Here are a couple of close-ups on my first layout: 
(I think it's my favorite page with this kit!)


Oodles of trim that I gathered with a running stitch … 


Had a little fun with stencils, molding paste and ink … just a light touch in keeping with the photo.  I have a little tute coming up on the "window" later this month over on the My Creative Scrapbook Blog. 

***


This second layout was kind of fun to do. I created a little stone path with a stencil, molding paste and inks.  Then decided to break one of the Ptima Princess wood icon wings in half and put it on my photo. Some layering, stamping, flowers and it was done .. 

Close-ies:


Love those Princess Flairs .. 


These gorgeous papers lend themselves to any design really … 

***

This third one was a really quick page! I came down with the flu but fortunately had my design elements chosen, a sketch and so, bit by bit, I got it done .. just in the nick of time! The month of April definitely had it's challenges! 


Love this photo of little Peyton with her Easter basket! 


Had a little background fun again! 


More flowers, icons and bling along with some thread from my stash .. 


Love the collage paper .. so good for fussy cutting, too! 

***

Here is number 4! Inspired by so many other artists .. Teresa Manchez, Robin Schelin, Lisa Gregory and our own Marilyn Rivera. 

I spent soooo many hours on this one but never got quite the look I was going for … but there again, there is much I love about it, too! 

This is little Joseph, the newest member of out family! Still young enough to be surrounded by flowers, right? 


Punch work, damask stenciling, and some Lindy's Grab a Guy Gold … such a fave color! More flowers, Flair and some jute from my stash. 


Love these papers! Thank you, Jodie Lee, for your gorgeous designs! 


Gesso for blending everything … 


I guess that just about wraps it up for today! I hope you will visit the Design Team Gallery and see what the Design Team did with all 4 fabulous Kits. To find out how to purchase a Kit and/or become a subscriber, you can visit the Information page. There's a listing there of each Kit along with the Kit contents.

Thanks for coming by!
Hope you have a great week! 

Thursday, May 1, 2014

Creative Embellishments/The Color Room combo challenges!


Hello, paper people! Hope you are doing well! 

Today I'm sharing a project that is a collaborative effort for both Creative Embellishments and HeArt and Soul Artists, presented by The Color Room. So, I had 5 challenges to combine in all. I had to use:

1. The Creative Embellishments sketch
2. The Creative Embellishments inspiration photo
3. Use Creative Embellishments products
4. The The Color Room palette #168
5. Use thread per The Color Room challenge

Whew,  and I did it! 

I truly enjoyed creating for the May Creative Embellishments Challenge! This sketch (by our own Nicolle Kramer) was perfect for creating a layout about a favorite vacation spot of mine, Santa Fe, New Mexico. We often stay at the Inn on the Alameda, so I've used a photo from their website. This month's CE inspiration photo just screamed vacation to me ... something I'm desperately needing! It reminded me of where my parents lived in Colorado and which is a stone's throw from Santa Fe. I've used two divine pieces of chipboard from Creative Embellishments, the Twig Frame and Fall Leaves and the Pussy Willow. I've also done some random stamping with the Distressed Grid and Tire Track 2
I hope you have a chance to play along with us this month! 

Please visit Creative Embellishments to see all the Challenge details and to see what the other designer's have done this time around! 


On the Twig Frame and Fall Leaves frame itself I've used Dusty Attic Rusting Powder. For the leaves of the Twig frame, I've just gessoed and then inked and misted the edges with Vintage Photo distress ink. The Pussy Willow is treated with white gesso and a bit of chalk ink and cinnamon Stickles.  And don't you love all that Petaloo and burlap goodness????? 

Below is a photo of  The Color Room palette and household item challenge. I adored working with these earth tones .. such a fave for me! I love when the colors come easily for me … makes creating so much more relaxing! I hope to see you over there as well! 


Thanks so much for coming by today! I always appreciate your sweet comments! 
Hope you are having a great week!