Wednesday, July 11, 2018

It's Party Time ~ Creative Embellishments

Happy Wednesday, everyone!

It's my turn on the Creative Embellishments blog today and I'm so honored and humbled to be here!
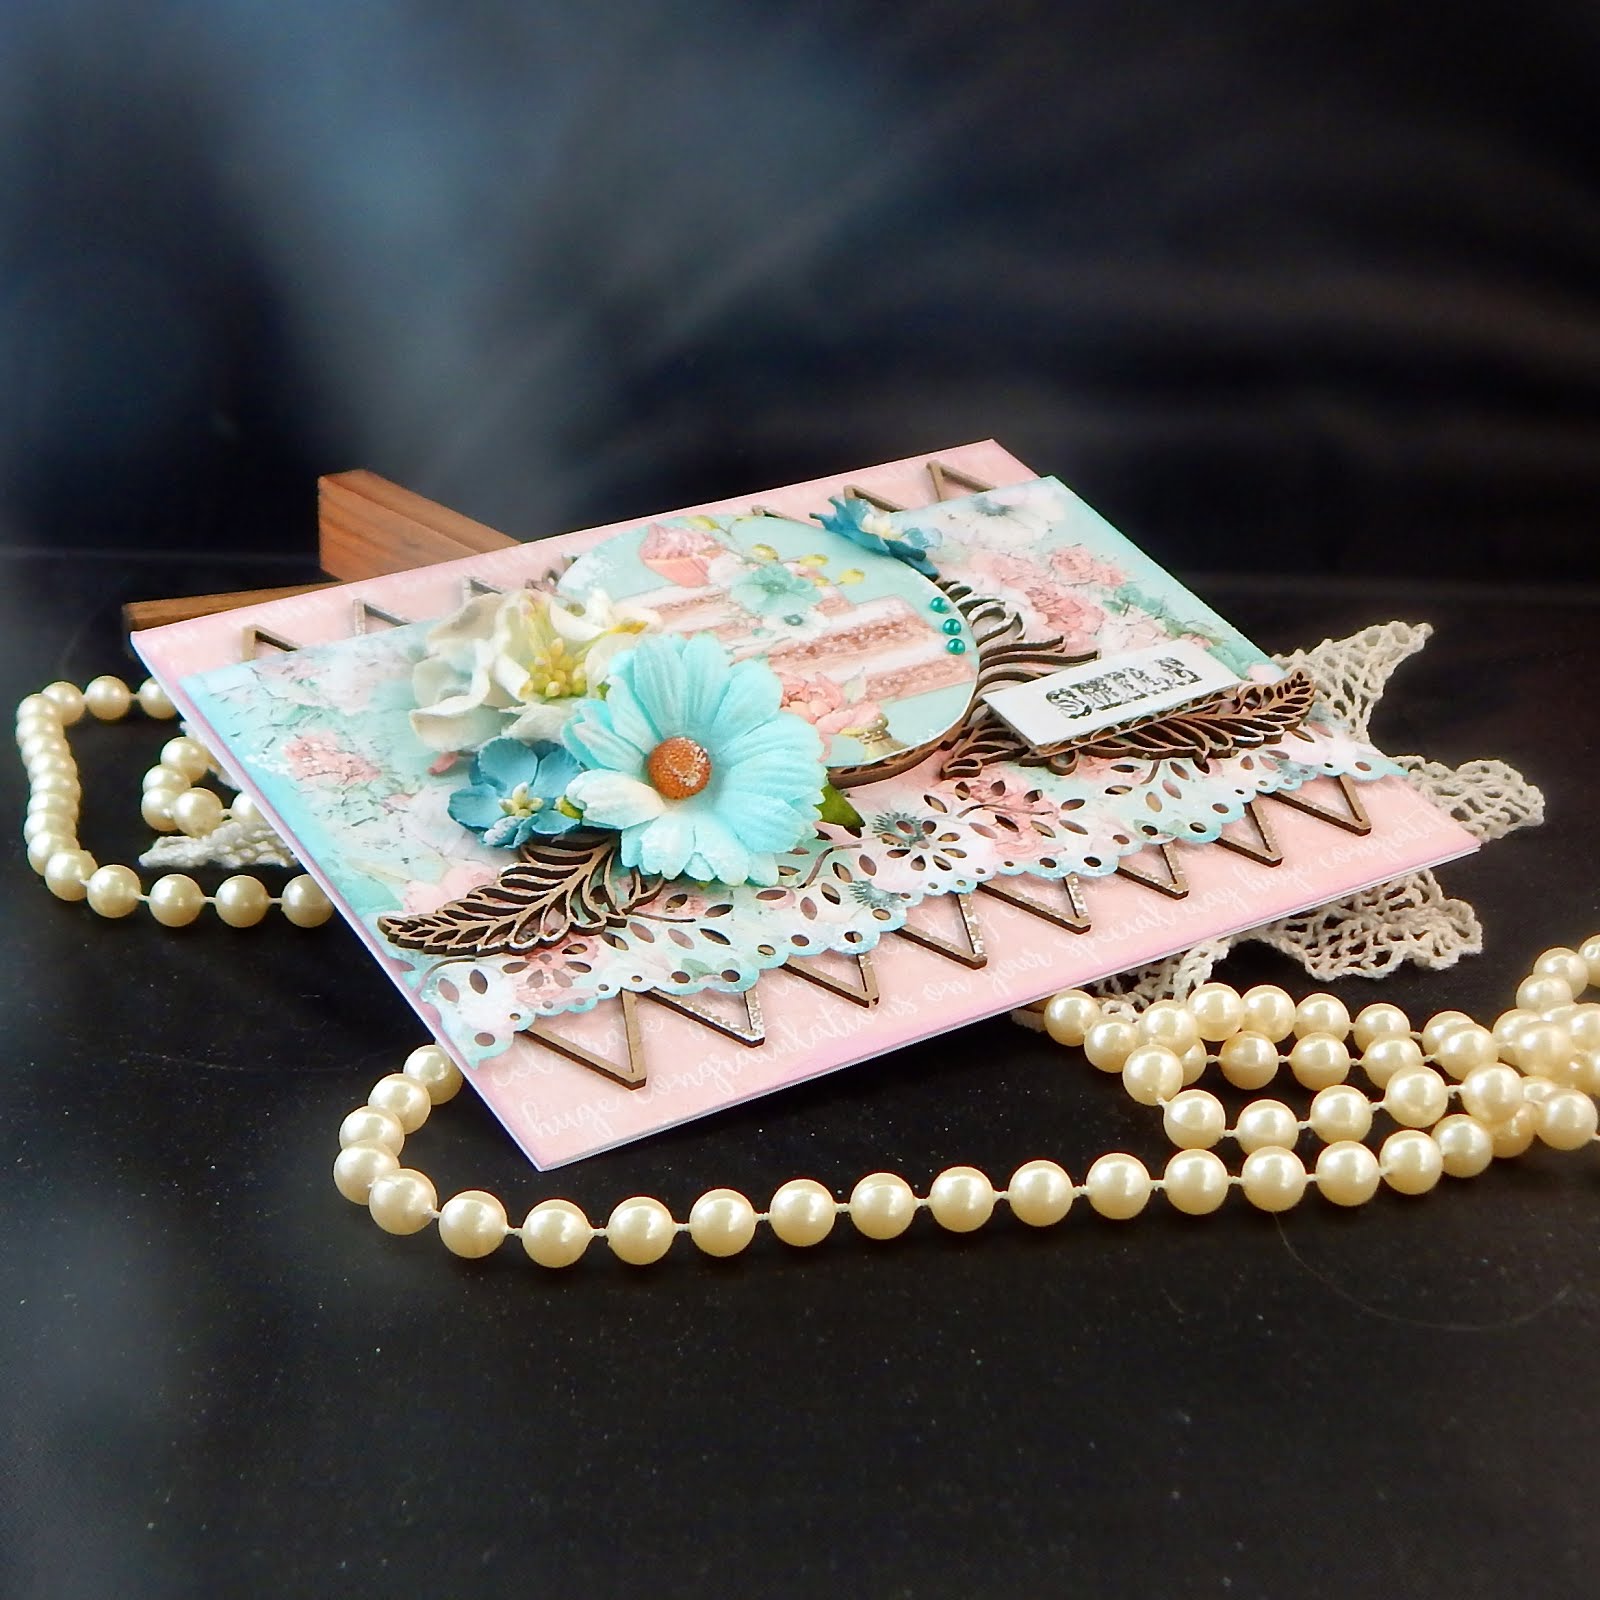
Today I'm sharing a birthday card and tag set. My card stash is getting low, so I needed to spend some time creating.


Like many crafters, I have lots of older paper collections in my stash and reached for this gorgeous Celebrations paper from Mintay by Karola Witczak. Because I wanted to focus on one of the awesome cake/cupcake images, I designed my project around an awesome layer cake. Luckily for me, the image size was perfect for a Creative Embellishments frame that I've been wanting to use: the Fern Frame. The center of the frame is right about 2 1/2 inches, so perfect for a smaller photo.


Because the 6x6 panels are my all-time favorite Creative Embellishments item, I grabbed the very cool Harlequin Lattice and used it as a layer for my card between the pink script paper and the blue floral. I've punched one edge of the floral design and then stamped the outer edges of it with the Distressed Crackle Stamp. That one is probably my most used stamp ever, so it's definitely worth the investment.


For once, I left my chipboard bare with no alteration except for a dab of white gesso at the end. Which I never do!!! I usually at least ink these babies but this time I wanted the rich tones of the chipboard to lie against the pink and blue.


Isn't that Fern Frame divine?! 
For my use, I mounted the fussy cut cake image and adhered it to the top of the frame. Lastly, I dabbed everything with white gesso. 


Moving on to the tag ... which I dearly love to create! 

I've layered 4 paper layers to create the tag with one of those being the fussy cut balloons that you see  on the right hand side of the creation. They are so cute! 
To co-ordinate with the card, I've used the Distressed Crackle Stamp again. 


Finally, I added a few flowers and turquoise flat back pearls.
I then added the #party from the Social Hash Tags set. Again, I left the chippie bare except for dabbed gesso. (If you are searching for these, hash tag is 2 words on this particular description.)

This photo shows my layers just a bit better.
After adding some tulle at the top, I was done.

Thanks for coming by the blog today.
Be sure and browse the store at Creative Embellishments.com.

Sandi


CE Products used:
Distressed Crackle Stamp

Sunday, July 1, 2018

Believe ~ Creative Embellishments July Challenge


Hello, everyone!
Thanks for coming by!

Today I have the pleasure of sharing my Design Team project for Creative Embellishments July Challenge.  Suffice it to say that I am beyond thrilled to be a part of this team once again! I've waited a long time to be back HOME!


"Believe"

The inspiration photo for this months challenge is at the end of this post .. and it's a winner in my book! The patriotic colors were perfect for a photo I wanted to get scrapped for my granddaughter. She recently graduated and we have a nice, new batch of photos of her! She's normally a behind the scenes kind of gal!
The "twist" on the challenge this month  is color blocking .. which I interpreted very loosely.


Here is a normal view of the layout which looked very different from the actual page, so I rotated it slightly in my primary photo. The sketch of the layout was based on a layout done by Yvette Weber.


So by now you are probably spying some of awesome chipboard pieces which were all treated with gesso and then embossed with a red/orange embossing powder. This formed a co-hesive look. They have  a sort of gold glow to them. My primary frame for the photo is the Stars in my Universe Frame which I have loved since its first appearance in the store! It seemed perfect to celebrate my grad gal. Then I paired this with some of Star Pieces. I recently got some new Santorini flowers from Prima and they look divine with this color scheme. The red are older Petaloo. A perfect red flower is hard to come by and these fit the bill perfectly.


I used a couple of the Vintage Patriotic Flair buttons around the photo. I think the Flairs are the best kept secret at CE!


Just another view of the chipboard and floral cluster with another flair.


And here is the striped flair.


A close-up of the Believe title from the Inspire Word Set.


Now you can peek at some of the mixed media work done using the Distressed Circle Stencil and super heavy gesso. I've also done lots of random stamping with my all-time favorite Circle Bokeh Stamp. It's my go-to stamp!


Couldn't resist showing another shot of this Vintage Patriotic Flair.
My granddaughter's graduation was at Dallas Baptist University and it was both reverent and very patriotic, so this theme is perfect!


More of the mixed media and chipboard work.


And a couple of last dimensional shots.


I thought my upward flourish kind of went along with the inspo photo!

Here is the inspirational photo for July. You will find all the rules over at Creative Embellishments

CE Products used:
Inspire Word Set
Circle Bokeh Stamp
Distressed Circle Stencil
Vintage Patriotic Flair

Thanks again for coming by!
As always I appreciate your visit.
Can't wait to see how you interpret the challenge!

Sandi


Saturday, June 30, 2018

New Design Team Announcement! I'm BACKKK!!!


Finally I can share my news!~ It has been so hard to keep this one a secret! 
I am over the moon excited to announce that I'm one of lucky designers to be chosen for the Creative Embellishments July - Dec, 2018 Design Team.  You may recall that I was on the original Design Team a few years ago and I have worked hard the past few years to make it back HOME!! 

Eeeccckkkk! 

 I have already received my first DT package and as always am blown away at the quality and precision detail on these awesome products. Who doesn't love using chipboard???  CE also creates wood veneer,  rubber stamps, stencils and flair. 


Here is a little bit about Creative Embellishments:

"Creative Embellishments is a new family owned company that was created by Michael and Nicolle Kramer. We are a husband and wife team who design and manufacture unique, high quality chipboard, wood and rubber stamp products. It is our mission to offer fun and inspiring products to bring out your inner creativity that you can add to any project. In the near future we will be expanding into other mediums such as rubber/acrylic stamps and acrylic embellishments."


So, stay tuned for some fun projects coming up very soon.  
And please visit the CE Blog to see what's going on right now!!! 

Because tomorrow is July 1st, the July challenge will be posted then. 
(I might just have a new project posted there!) 

And here as well ... for all the close-ups.


Sandi


Wednesday, June 27, 2018

Shimmerz Design Team ~ A Faith-based Work ~ For You ~

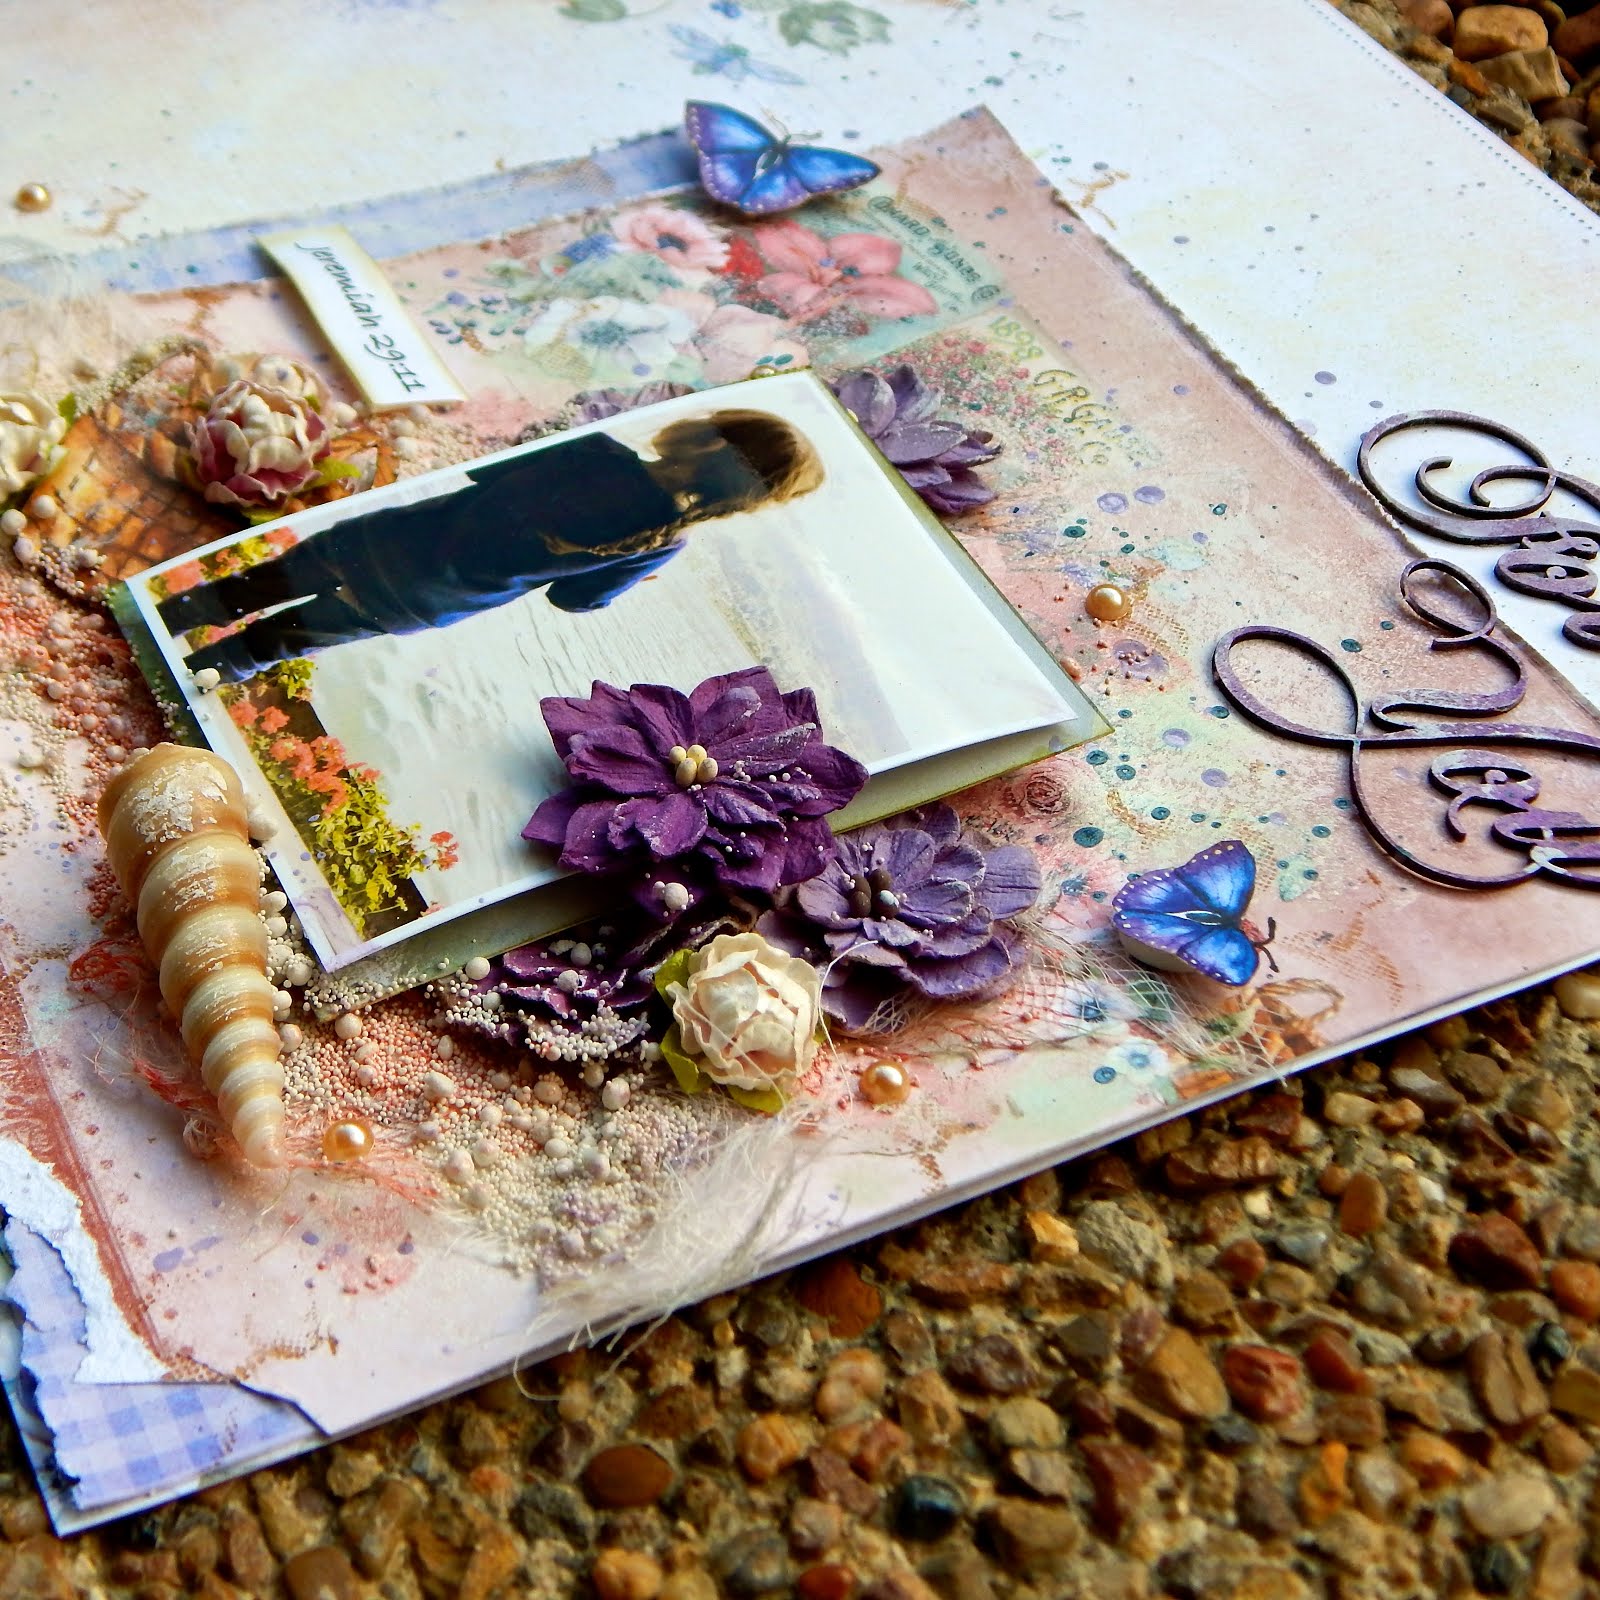
"For I know the plans I have for you,” declares the Lord, “plans to prosper you and not to harm you, plans to give you hope and a future." Jer. 29:11

Hello, Shimmerz Paints fans! 


Sandi Clarkson here with you today sharing another Design Team project for this month. 

This was one of those projects that sort of changed mid-stream. It was not until I chose my title chipboard from Creative Embellishments that I realized my creative time needed to be a time of prayer and reflection while creating.

You see,  this wee granddaughter is on the mission field with her parents in Shell, Ecuador ... and I felt a kinship in the way she looked out into the distance at waters's edge.  I prayed for their safety, their work and that I would have the same courage they do to spread the word of God.  Conversely, it was an evening spent claiming God's promise that our future is in His Hands, in fact He has already planned it.  We need only to follow where He leads. 


I've used some 49 and Market paper "Cottage Life"  along with a mix of flowers from my stash. Initially, I was looking for blue flowers but quickly realized the blue tones are actually more purple. But that was nice because then I had a familiar color scheme going. 


My papers were primed with white gesso and then I colorized around my photo cluster with Going Peach Side and Olive U Truly.  May chipboard title was painted with Royal Grape, then dabbed with gesso to blend.  My title piece is by Creative Embellishments and can be found HERE.


I used 2 different colors for my splattering: Lilac Blossom and Steely Blue Eyes Inklingz. This created a beautiful effect for the primary design as well as helped blend it upward toward the printed florals on the upper left. 


I fussy cut a basket from the Cottage Life collection and added a few blooms. Of course, I've added my computer generated scripture reference. There is some random stamping for depth and a few ivory pearls for texture. 


Loved finishing up with some art stones to produce a sand effect and then this one shell. 


The butterflies were also fussy cut. and popped for dimension. 

This is a good view of the Going Peach Side! 


Just a close-up of the title work done in Royal Purple.

I guess that is about it for me today.
Thanks for coming by!
Don't forget to include my name Sandi when you place an order for a free surprise product.

Shimmerz Products used:
Going Peach Side
Olive U Truly
Royal Grape
Lilac Blossom
Steely Blue Eyes Inklingz

Creative Embellishments Products used:
Crazy for You word set


Wednesday, June 13, 2018

"Happy" ... a "girly" Shimmerz layout with Sandi

Hello, Shimmerz fans! 

Sandi here with you today sharing my most recent Shimmerz DT project! 

I have a sweet girly layout that has been sitting on my desk for a few days until I had a chance to find some creative time! We have a new puppy at our house and things have been a little hectic! :)


"Happy"

I had some inky fun with my background after applying a layer of clear gesso. Super heavy gesso was pushed through a stencil to create some texture and then I applied the Plum Pudding Spritz heavily throughout using a "transfer" technique. My 2 chipboard pieces (Creative Embellishments, Flourish 29 and Photo Booth Film Strip) were colorized with the gorgeous Peacocks Plume Shimmerz.


Next I began building my layers and adding my photo. Because I had a ton of florals left over from a previous kit I'd been using, I decide to go BIG and add them all! Also tucked in were some die cuts pieces, cheesecloth, twine and a flair button from Creative Embellishments Seasons Change flair.


Once everything was in place, I enhanced the focal point with more of the Plum Pudding Spritz using a brush and blending it in, Then I splattered using the remaining 3 Shimmerz colors: Lilac Blossom ShimmerzRoyal Purple Shimmerz and Limoncello Shimmerz. Limoncello was also used to highlight some of the florals. It's a great new color! 


My very last step was to add some purple prills for additional texture.


I'm so glad that you came by today! 
For a FREE Shimmerz product, please add SANDI to the memo line on your order. 
See you next time! 

Sandi

Shimmerz Products used: