Wednesday, February 20, 2019

Mocha ~ Best Dog Ever with Creative Embellishments

Hello, Creative Embellishments fans! 

Today I'm sharing a sweet tribute layout for my youngest daughter whose little doggie sadly went over the rainbow bridge a few weeks ago. Mocha was tiny in stature but had a huge personality, 


Since this was my daughter's favorite photo, I stayed within the earth tone color family and used tan, brown and gold with some pale blue 49 and Market flowers to match Mocha's little blanket.

I have not used the wood veneer Alphabet Game Pieces before and wow, I've been missing a great alphabet set for titles and such! I left them natural for my use here. And will most definitely be getting more of them.


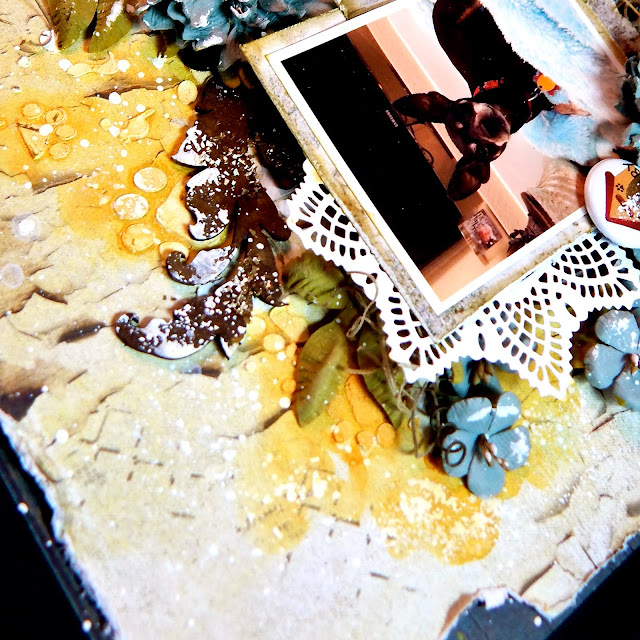
My background was prepared with clear gesso and then modeling paste pushed through the Muddy Paws Stencil. It is ideal for your fur baby layouts! Next I colorized my focal point with some Lindys Grab a Guy Gold.

For a nice frame, I chose the Viney Flourish Frame and inked it brown, then added a bit of chunky gold glitter.  It was layered under my focal point.

Look at those sweet alphas .. awww!
 And that cute flair from the Puppy Love Flair set!

Next I took the Zigzag Stitch Border and broke my own rule by cutting it in half! I love these nice, long pieces but needed to shorten them for this page. They were also inked with walnut.

You can also note the Happy Tails Flair here.


As I was preparing the background, I randomly stamped with the Distressed Chicken Wire Stamp which adds a nice dimension. For addition texture, I've added in some moss rose.


Just a view from the top of the layout to show more of the wonderful Viney Flourish Frame

This was kind of a hard project to do since I knew it would need to be extra special. With all the great fur baby products from the Creative Embellishments store, it was an easier task!

Creative Embellishments products used:
Chipboard:
Wood Veneer:
Stamp:
Stencil:
Flair:

See you again next time!


Wednesday, February 13, 2019

"Yes!" ~ a wedding layout for Shimmerz Paints

Hello, scrappy friends! 
Tomorrow is Valentine's Day. So, how about a sweet wedding layout to celebrate?
It's Sandi here today touting the beauty of the Shimmerz Paints products! 


I love how this layout featuring one of my nieces turned out. After starting with a coat of clear gesso, I played around with my design and planned where my elements would be. 

Next I heat embossed my chipboard piece and assembled my paper layers. I marked where they belonged and then got busy adding my color.


and ...


This time instead of using my tried and true" transfer" technique, I went back to basics and just painted my color on with a small paintbrush and then sprayed my strokes with water from a misting bottle. After applying the water, I just moved my paper around and let the watercolor effect emerge! Sometimes, I added more water and at other times, I added back in some more of the color.

Based on my chosen patterned paper from Blue Fern Studios, I used Coloringz Pink StilettosVibez Palm Reader and Vibez Glorious Day.


Here are some close-ups:


I was so pleased with how the color and shimmer turned out! 
It really draws the eye to the photo.

Thanks for coming by today. 
I hope you've been inspired to create.

Today's post will be my last for Shimmerz Paints for this term. 
I thank Stacey and Sami so very much for having me here. 
It's a very bittersweet kind of day but I've so enjoyed my time here as part of this team. 


Sandi


Shimmerz products used: 

Wednesday, February 6, 2019

"Family" layout with Creative Embellishments

Hello, Creative Embellishments fans!

Sandi here with you today sharing my latest project with a photo of my niece and her husband.

In keeping with the month of Love, I've once again gone with some pinkish/purple tones and some romantic elements.


I've been wanting to use the Rose Set 1 flowers and decided this was the perfect project.

Papers are by 13 Arts.


Here is a close-up pf the gorgeous Rose Set. They were treated with some Shimmerz Paints and then the leafy areas were heat embossed. I added white gesso underneath these delicate beauties to help them stand out a bit more. I've also added some tinted cheesecloth for texture and definition.


On the left side of the focal area, I added the Grunge Corner piece ... one of my faves! It was treated with some brown Shimmerz mist. I tucked another one of the Rose Set flowers here as well.


Running vertically under my focal point is the Checker Border which is treated the same as the Grunge Corner.


When I was preparing my background, I used clear gesso and then did some random stamping with a couple of the Creative Embellishments stamps: Distressed Corner Stamp and Distressed Text Stamp.


Because I used some floral chipboard, I felt the project only needed a few more embellishments, so after adding some art stones, I tucked on a few small flowers, my title and a metal key to represent mine and Kim's maiden name.


Thanks so much for coming by today. I hope you found some inspiration!


Creative Embellishments products used:


Friday, February 1, 2019

February Challenge at Creative Embellishments is Live!

Hello to all my crafting buddies! 
Here we are flipping the calendar over again ... to February, can you believe?

I'm back today to share my take on this months Challenge at Creative Embellishments
This time around we have a Color Challenge, so be forewarned. 
Admittedly, I took a leaner, paler version of the challenge but hey that's okay because I got that beautiful lace "twist" on there! 


I designed a couple of quick Valentine's cards because I needed them anyway. 
I used some papers from Prima's Lavender Frost. 

After deciding on my design, I grabbed my chipboard pieces and altered them with Walnut Ink. My favorite alter these days. 


After layering my paper and adding some dangling lace, I added part of the Heartbeat Border which is such a gorgeous, delicate piece. Love it! 

Next, I added some embellishments and then the "Love" word from the Valentines Word Set


For the second card, I went vertical and again used the remainder of the Heartbeat Border and the "Cupid" word from the Valentines Word Set. A few embellishments and this one is done as well! 

Sometimes, I tend to overthink card making too much, lol! 


Here is another angle on my gorgeous cards .. all ready for Valentine's! 

And here is the Challenge image:


I hope that you will find time to play along.
Here's a Link to where you can find our blog and see all the Design Team examples as well as the link to play along!

Thanks for coming by.
I always appreciate each visit and comment.


Creative Embellishments products used:
Heartbeat Border
Valentines Word Set