Thursday, May 26, 2022

Cards for any occasion! ~ Creative Embellishments

 Hello, everyone! 
How are you doing during this busy month of May? 
It's really busy for me but I am grateful to be able to be out and about after the past few years. 

If you have been around for awhile, you may remember that I have about 12 birthday people just in my family alone during May and June! 
So, I need to get in gear and ramp up my card making while keeping it simple. 


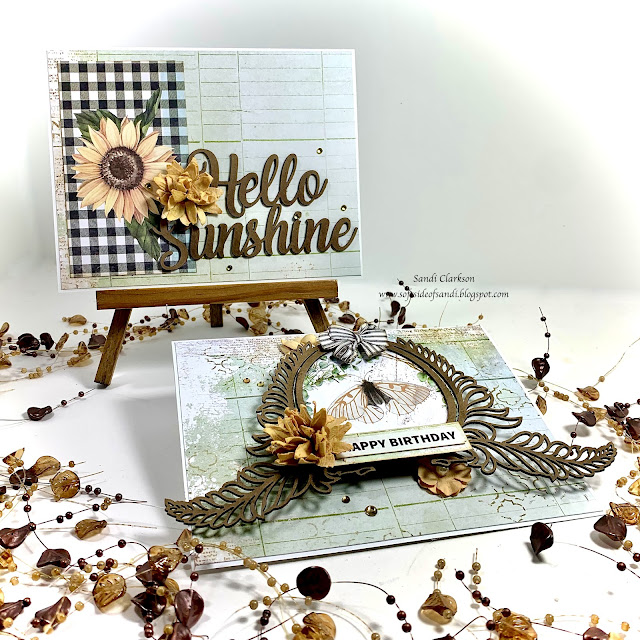
This is what I came up with yesterday. My focus was specifically on a couple of favorites: the ever perfect Fern Frame and the oh, so cute: Hello Sunshine chippy. 

For papers, I went with Prima's Pumpkin and Spice collection but avoided the Fall and pumpkin elements. For the card backgrounds, I've used the great green ledger paper and my focal elements were fussy cut from the notecards. 


As I already mentioned, my goal was to feature simple card making designs. So, for this awesome butterfly card, I altered the Fern Frame chipboard with walnut stain. While that was drying, I added the ledger paper to a pre-cut card base and randomly stamped with brown archival ink and the wonderful Distressed Moroccan Stamp

Next, I fussy cut the butterfly and foliage image and adhered it to the back of the frame. Then I adhered that to corrugated cardboard for height and dimensions. I also fussy cut the sweet bow and added that with a foam square. My Happy Birthday title is from 13 Arts and is also elevated on corrugated cardboard. 

Lastly, I added a few florals and rhinestones. I'm really loving the clean, summer vibe!


Next up, I've used the same ideas but did not use the Distressed Moroccan Stamp for this one. I added the die cut paper with the bright sunflower and felt that was enough. My Hello Sunshine title was again altered with walnut stain. I lined it up with a line on the ledger background and there you go! For embellishment, I added one floral and 5 or 6 rhinestones. 

If you are like myself, choosing the paper is the hard part! 
But ... Playing with chipboard is FUN! 

Hopefully, you are inspired to make some quick cards for any upcoming occasion that you may have. 

Creative Embellishments products used: 
Chipboard: 
Stamp:

See you next time! 
Sandi

Friday, May 20, 2022

"Endurance" ~ Creative Embellishments Canvas

 Hello, creative friends! 

Sandi Clarkson here with you today sharing a fun canvas board I created featuring a photo of my daughter and her twin boys. Since they are way too big for her to lift them, they stood on a couple of chairs to replicate their traditional Lift photo on their birthday. 


I started my canvas with my crackle background and let it air dry overnight. 
Tip: I usually prepare a couple of these at a time so that they will be ready for use. 

So, the next steps were printing a photo,  adding my color using 13 Arts mediums and then selecting some my chipboard as well as florals because they would be instrumental in supporting the photo. 


I really wanted to use the new Delicate floral Frame, so I stained that with Walnut ink and then hit it a few times with 13 Arts Pearl Gold spray. Because it was so much larger than my photo, I used it as more of a base layer but it still provided the enhancement of my focal area that I needed.


Sometimes I forget to make use of all the lovely Flourishes in the CE Store, so I ordered some new ones recently to keep them more front of mind. I selected the Flourish Set 18 for today's project. It was gessoed and then painted with a mix of paint from 13 Arts. For consistency, I also used some of the Pearl Gold mist on this chippy as well. 


There are some awesome new pieces in the chipboard selections, so I snagged a word from the new Determination Word Set and used that as my title. Along with that, I also ordered some of the new Boho Arrows. I thought the straight one helped to anchor my title and then the more circular one I save for my photo area.  When I ordered these, I was reminded of Psalms 127:3-5 regarding how blessed we are with a quiver full of children. This is my daughter's mantra. 


Here is the second piece of the flourish set and also a bit of the Delicate Floral Frame. 


Although I had intended to use some other kind of embellishments, as I worked I just gravitated to the florals and then didn't really have need of the Ephemera I had chosen. My photo was matted with paper form the new 13 Arts Industrial Zone collection. For texture, I've used cheesecloth, florals, pearls and of course chipboard. 


After adding some pearls, I splattered and dabbed the canvas with watered down white paint. 


Isn't that Arrow just the cutest? 
As are my sweet tiny flowers, all from 49 and Market. 


One quick photo near the top visualizing the Flourish and the Floral Frame. 

That's it for me today! 
Be sure and leave a comment if you have any this project or about Creative Embellishments. 

See you next time! 
Sandi

Creative Embellishments products used: 

Flourish Set 18


Thursday, May 12, 2022

Perfect Moment ~ Creative Embellishments

Hello, Creative Embellishments fans! 

Sandi Clarkson here with you today sharing my newest project for the CE Design Team. 

Whether for Prom or for a wedding, it's all about the Dress, yes? 


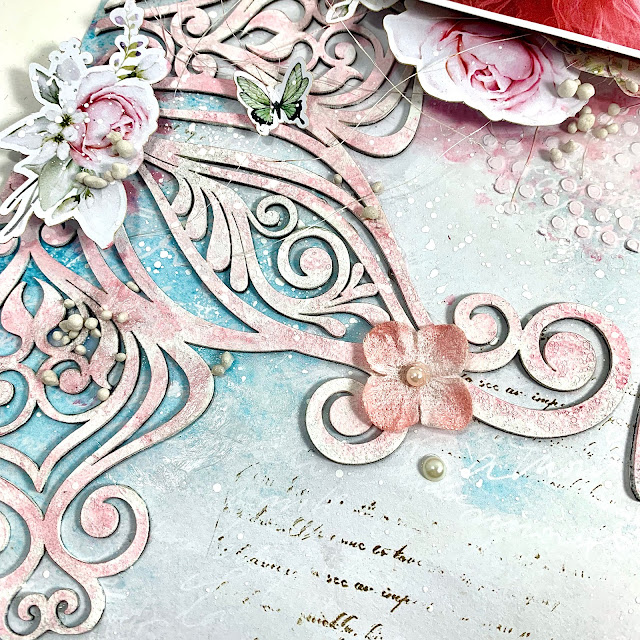
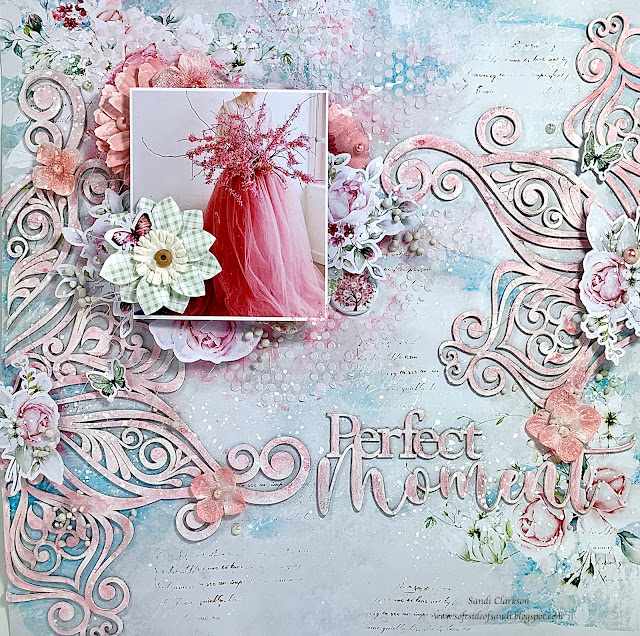
For today' project, I've gone with designing a layout and using the stand-out chipboard piece Intricate Twist. Wowzers! This piece is 10x10 inches and is SO gorgeous! 

For my purposes, I opted to cut it into 2 pieces and use these pieces along the right and left sides of my layout. I will note that it was quite difficult to cut even using a guillotine trimmer, so I ended up cutting it with my scissors after using a ruler as a guide. It is so intricate that the chipboard is rather soft, if that makes any sense. 


I originally painted the chipboard using white acrylic paint but after I adhered it to the cardstock, I decided to add some color using a dry medium and then used a water brush to adjust the shade. I wanted a soft watercolor, ethereal look. 


Before adhering the cardstock, I prepped my paper from 13 Arts (Rose in Love) with clear gesso and then did some random stamping with the Distressed Script Stamp and brown archival ink. When that was dry, I added some texture with modeling paste and the Small Circles Stencil. All mediums are 13 Arts. 


For a title, I went with the lovely Perfect Moment piece and altered it the same way as the large statement piece. 


I kept my embellishments as well as my background work rather simple because the beautiful Intricate Twist piece commands the attention, don't you agree? 

I did add die cut ephemera that matches the Rose in Love paper collection from 13 Arts. 


In addition to the ephemera, I've added some pearls and some art stones along with some ecru sisal for texture. 


Around my focal area, I did some color work using the same color as I used on the chipboard. For an extra texture, I added a sweet pink/peach flair button form the Seasons Change set. 


I finished with some splattering and dabbing of watered down white paint. 

I hope you can find some time during the busy month of May to do some creating! 

Art is good for the soul. 


Thanks for stopping by the blog today! 

Sandi


Creative Embellishments products used: 

Chipboard:

Intricate Twist

Perfect Moment

Stencil: 

Small Circles Stencil

Stamp:

Distressed Script Stamp

Flair: 

Seasons Change


13 Arts Rose in Love paper collection